10 Fairy Shag Haircut Long Ideas
The long fairy shag haircut represents an ethereal, heavily layered hairstyle that blends the rebellious edge of a classic seventies shag with the whimsical, weightless softness of fairycore aesthetics. Choosing a fairy shag on long hair allows individuals to retain dramatic length down their back while introducing abundant volume, crown lift, and delicate, face-framing tendrils around the eyes and cheekbones. In this comprehensive guide, you will explore ten distinct variations of the long fairy shag, tailored for diverse hair textures, density levels, and personal aesthetics. Readers will discover the structural differences between razor-cut wispy tiers, curtain fringe integrations, botanical wave styling, and textured color placements. This guide provides step by step styling tutorials, heatless forming techniques, daily maintenance routines, and tool selection advice to help you maintain healthy, defined layers. Transitioning to a long fairy shag provides high practical value by removing excess interior weight from thick tresses, enhancing natural movement, and eliminating flat, lifeless lengths. Whether you are refreshing your long locks or seeking an effortless, undone aesthetic that celebrates natural texture, mastering these styling methods equips you with actionable inspiration to achieve an enchanting, salon-grade finish at home.
Why This Idea Is Trending or Useful
The surge in popularity of long fairy shag haircuts across modern Pinterest ideas stems from the growing cultural shift toward romantic, natural textures and low-maintenance everyday beauty routines. In contemporary styling, the fairy shag serves as a softer, more delicate evolution of the bold wolf cut and vintage rock shag. By utilizing feathered transitions and wispy perimeter tails, this style flatters round, heart, oval, and square facial shapes by softening angular jawlines and drawing focus to the eyes. The practical value of this haircut lies in its organic adaptability; it works seamlessly with straight, wavy, curly, and coily textures while requiring minimal aggressive heat styling to look intentional. Beginners appreciate the accessible DIY styling appeal, as the layered architecture allows hair to air-dry into effortless, undulating shapes with simple texturizing creams or sea salt sprays. Furthermore, removing interior density prevents long hair from pulling flat against the scalp, creating natural crown lift without constant teasing. Because the tiered layers grow out gracefully without harsh demarcation lines, the fairy shag represents a cost-effective, long-lasting haircut for busy individuals seeking elevated daily style.
Materials and Preparation
Proper preparation, professional sectioning, and the selection of lightweight haircare products establish the foundation for a vibrant, weightless fairy shag on long lengths. Essential styling materials include weightless leave-in conditioning mists, sea salt texturizing sprays, matte hair styling pastes, flexible-hold dry finishing sprays, and non-greasy hair sealing oils. Key styling tools include an ionic blow dryer equipped with a deep-bowl diffuser, a natural boar-bristle round brush, sectioning alligator clips, a one-inch ceramic curling iron or flat iron, and a fine-tooth rat-tail comb for precision parting. Preparation begins by assessing your natural wave pattern and hair elasticity to determine the optimal starting height for the shortest crown layers. Wash hair thoroughly with a clarifying, sulfate-free shampoo to remove silicone buildup, followed by a lightweight moisture rinse applied strictly to the mid-lengths and ends. Towel-dry gently with a microfiber hair wrap to prevent surface friction and frizz. Before applying any thermal tools, coat every strand with a broad-spectrum heat protectant spray rated up to 400 degrees Fahrenheit, ensuring the delicate, razor-cut tips remain smooth, sealed, and resistant to split ends during routine styling.
 SAVE TO PINTEREST
Ethereal Wispy Tiered Woodland Long Shag
Step-by-Step Guide
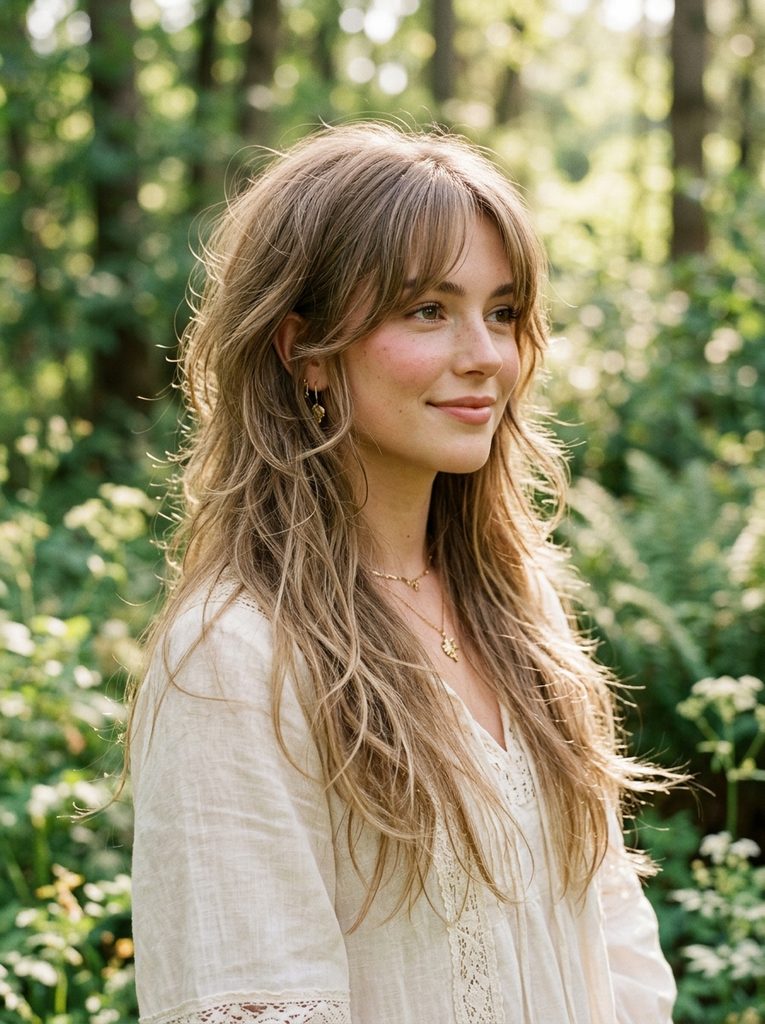
The ethereal wispy tiered woodland long shag emphasizes ultra-fine, feathered transitions that cascade from a lightweight, rounded crown down to delicate, translucent tips along the lower back. This design utilizes progressive razor point-cutting to create soft, separated layers that mimic natural, windblown foliage textures. Unlike traditional heavy shags, the woodland variation removes bulk from the interior while keeping the perimeter perimeter wispy and airy, resulting in a floating silhouette. The multi-tiered structure allows air to circulate between layers, making long hair feel weightless and full of dynamic bounce. This style is especially flattering for fine to medium hair densities, as the micro-layering builds the optical illusion of multidimensional fullness without sacrificing total length.
To style this ethereal woodland cut, begin by misting clean, damp hair generously with an airy sea salt spray from roots to ends. Section out the top crown layers and dry them using a medium round ceramic brush, lifting hair vertically from the scalp to build foundational height before rolling the brush backward to create a soft, flipped-back canopy. Attach a wide diffuser to your blow dryer, tipping your head to each side to dry the long lower tiers on low heat and low airflow, encouraging natural, separated waves. Once completely dry, dispense a pea-sized amount of matte texturizing cream onto your fingertips and gently pinch the ends of the wispy face-framing pieces to define their feathered direction. Lock the airy crown lift in place with a light mist of flexible-hold aerosol texturizer.
 SAVE TO PINTEREST
Butterfly Wing Layered Fairy Shag
How to Create
The butterfly wing layered fairy shag incorporates expansive, swooping face-framing layers that curve outward away from the cheekbones and jawline, resembling the symmetrical arches of delicate butterfly wings. This cut features prominent curtain bangs that blend into progressive step-layers, establishing a continuous outward flare that opens up the facial contours. The lower lengths remain long, soft, and textured, anchoring the voluminous upper half of the hairstyle. This architectural cut provides balanced structural movement for thick, dense hair types by eliminating heavy bulk from the sides while showcasing length across the shoulders, making it a standout choice for romantic aesthetics.
Start by applying a palm-sized dollop of weightless volumizing mousse through damp mid-lengths and fringe sections. Divide your curtain bangs into two equal halves down the center, using a one-and-a-half-inch round thermal brush to blow-dry each side upward, rolling the brush outward away from your eyes to establish the signature sweeping wing curve. Dry the remaining long layers in vertical sections, using the round brush to create subtle outward bevels at the tips of each tier. Allow the hair to cool completely on the brush before releasing to lock in the structural shape. Once cooled, rake your fingers through the hair to merge the tiers smoothly, and apply a single drop of camellia hair oil across the surface to impart a polished, luminous sheen that highlights the fluttering outward layers.
 SAVE TO PINTEREST
Frosted Pastel Lavender Long Shag with Bottleneck Fringe
Setup Method
The frosted pastel lavender long shag with bottleneck fringe pairs avant-garde fantasy color palettes with delicate, face-contouring fringe architecture. The bottleneck fringe starts narrow at the center of the forehead, widens gracefully above the eyebrows, and curves down to hug the cheekbones, seamlessly merging into the top shag layers. The cool-toned pastel lavender hue accentuates the razor-cut separation of every individual strand, making the tiered layers catch light with iridescent brilliance. This cut is ideal for straight or lightly textured strands that benefit from visual dimension, offering a high-fashion, whimsical appearance that bridges fairycore charm with modern alternative beauty aesthetics.
To style this color-treated fairy shag, always prep dry strands with an antioxidant thermal shielding spray formulated specifically to protect pastel pigments from heat-induced fading. Use a fine-tooth comb to isolate the bottleneck fringe, smoothing the center with a narrow flat iron directed slightly inward, while turning the longer outer edges outward toward your ears. Take random two-inch sections of the long lower layers and pass a flat iron down the hair shaft in an alternating S-curve pattern, bending the wrist inward and outward to create subtle, ribbon-like waves. Avoid clamping the iron too tightly on the delicate bleached ends. Finish the routine by lightly dusting the roots with an oil-absorbing texturizing powder, massaging it in gently with your fingertips to maintain a matte, voluminous crown that supports the pastel layers.
 SAVE TO PINTEREST
Cascading Bohemian Mermaid Wave Fairy Shag
Execution Process
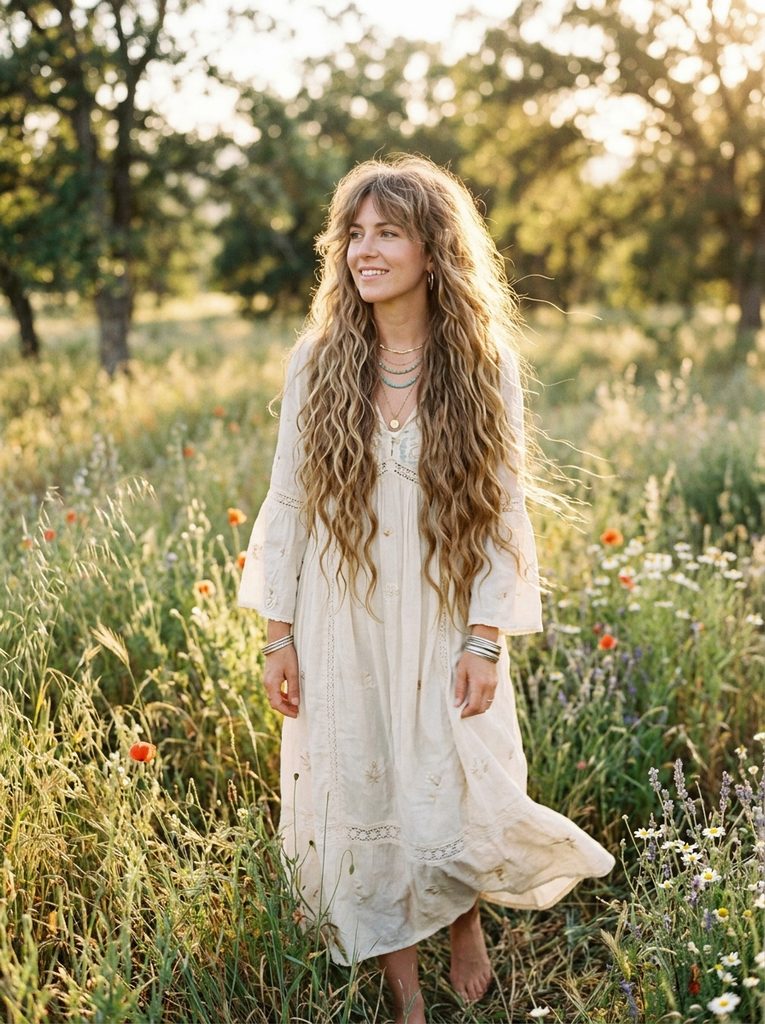
The cascading bohemian mermaid wave fairy shag celebrates deep, undulating wave patterns integrated across cascading layers that extend past the waistline. This design combines the relaxed, beachy freedom of long mermaid hair with the structured, crown-lifting layers of a traditional shag. Shorter crown layers prevent the heavy weight of waist-length tresses from dragging down root volume, allowing waves to bounce and coil freely from the scalp down to the ends. The overall silhouette is lush, textured, and delightfully undone, capturing a romantic, free-spirited aesthetic that fits outdoor festivals, warm summer months, and bohemian-inspired wardrobes.
Begin styling on freshly washed, damp hair by applying a rich leave-in curl enhancer combined with three pumps of lightweight jojoba oil. Divide hair into six thick vertical sections and plait them into loose three-strand braids before going to sleep, leaving the bottom two inches of each braid unplaited for a natural, straight-ended finish. In the morning, unravel the braids gently and avoid using brushes or fine combs that disrupt wave formations. Use your fingers to fluff the shorter crown layers, lifting them upward at the roots to activate separated volume. For added definition around the face, wrap two or three delicate strands around a half-inch curling wand for three seconds, and mist the entire cascading cascade with a hydrating botanical finishing spray.
 SAVE TO PINTEREST
Choppy Razor-Cut Grunge Fairy Shag
Step-by-Step Guide
The choppy razor-cut grunge fairy shag introduces a rebellious, nineties-inspired rock edge to soft fairy aesthetics through jagged lines, piecey texturing, and asymmetrical framing. Crafted almost entirely with a straight razor, this cut features blunt yet heavily thinned ends that create an intentional, shattered perimeter. The crown is cut short and disheveled, contrasting sharply with long, wispy bottom lengths. This intentional contrast produces an edgy, lived-in silhouette that looks effortlessly styled straight out of bed. It is an exceptional option for individuals with naturally coarse or straight hair seeking dramatic texture and an irreverent, fashion-forward attitude.
To achieve this undone grunge look, apply a quarter-sized amount of sea salt pomade to damp hair, working it vigorously through the root zone and mid-layers with your hands. Rough-dry the hair completely using your fingers instead of a brush, using your blow dryer on high heat and high airflow while shaking your head upside down to encourage chaotic separation. Once dry, take small random clusters of hair on the crown and twist them tightly, running a flat iron over each twisted rope for two seconds to create irregular, jagged kinks. Rub a dime-sized amount of matte molding paste between your palms and aggressively scrunch the bottom ends upward. Piece out the micro-bangs and sideburn tendrils to complete the raw, textured aesthetic.
 SAVE TO PINTEREST
Romantic Ribbon-Curled Fairy Shag with Micro Tendrils
How to Create
The romantic ribbon-curled fairy shag incorporates polished, spiral ribbon curls with delicate, wispy micro tendrils that frame the perimeter of the face and neck. This design relies on alternating curl diameters to create a rich, dimensional tapestry of soft spirals that nestle into the tiered layers. The shortest layers at the crown provide a halo of soft volume, while elongated curls trail down the back in graceful ribbons. Ultra-thin, straight micro tendrils are deliberately pulled free from the curls around the temples and ears, adding an effortless, ethereal softness reminiscent of classic Renaissance portraits.
To construct this romantic styling, start by applying a heat-activated curling lotion evenly across completely dry hair. Section hair into horizontal tiers, clipping the top layers out of the way. Using a one-inch ceramic curling wand held at a forty-five-degree angle, wrap one-inch square sections around the barrel from roots to ends, holding each section for five seconds before releasing the curl into your cupped hand to cool. Repeat throughout the entire head, curling all sections toward the center back. Use a metal rat-tail comb to gently tease the root base of the crown layers for structured height. Isolate tiny, half-inch tendrils along the hairline and sideburns, smoothing them flat with a quick pass of a mini iron to establish delicate textural contrast against the lush curls.
 SAVE TO PINTEREST
Gothic Midnight Black Fairy Shag with Pointed Fringe
Setup Method
The gothic midnight black fairy shag combines dramatic, high-shine raven pigmentation with razor-sharp geometric elements and feathery, floating layers. This look features a custom V-shaped or pointed micro-fringe that dips down toward the bridge of the nose, contrasting against soft, wispy side tendrils that taper along the jawline. The midnight black color absorbs and reflects light dramatically across the stepped layers, giving the haircut a striking, sculptural presence. This design appeals to dark academia, modern gothic, and alternative aesthetic enthusiasts who desire a bold, architectural frame for their eyes and cheekbones without relinquishing long hair length.
Begin by blow-drying the pointed micro-fringe flat against the forehead using a fine-tooth comb and a concentrator nozzle, moving the dryer in a downward cross-hatch pattern to eliminate cowlicks and ensure razor-straight precision. For the long layered body, mist hair with an ultra-light heat shield and divide into two-inch horizontal sections. Glide a flat iron down each section from root to mid-length, flicking the wrist outward at the very ends of the layers to create sharp, winged tips that stand out against dark clothing. Smooth a few drops of argan oil infused with black violet tint over the surface to enhance reflective gloss and eliminate static flyaways. Mist the bangs with a strong-hold freeze lacquer to keep the center point locked in position all day.
Textured Shag with Wispy Feathered Face Frame
Execution Process
The textured shag with a wispy feathered face frame focuses on continuous, soft layering that wraps closely around the contours of the face, neck, and shoulders. Rather than disconnected steps, this cut utilizes graduated slide-cutting techniques to create a continuous cascade of feather-light strands that hug the jawline and collarbones. The rear lengths remain long and soft, maintaining an understated silhouette that emphasizes natural movement over extreme volume. This design is exceptionally beginner friendly, as it grows out seamlessly and adapts easily to simple daily air-drying routines, making it a reliable staple for everyday professional and casual settings.
Prep clean, damp hair by raking a leave-in smoothing balm through the mid-lengths, followed by a light spritz of texture spray at the crown. Use a medium round boar-bristle brush to blow-dry the face-framing feathered layers, curling the brush inward toward your chin so the ends hug your facial contours naturally. For the long back sections, rough-dry with a paddle brush, following the natural fall of your hair. Once dry, take a wide-barrel curling iron and lightly curl only the very ends of the outer layers outward for two seconds, creating a subtle flicked texture that showcases the feathered edges. Apply a dab of nourishing hair butter between your palms and smooth down surface flyaways, leaving the feathered perimeter soft and touchable.
 SAVE TO PINTEREST
Sun-Bleached Honey Caramel Fairy Shag with Long Tail Ends
Step-by-Step Guide
The sun-bleached honey caramel fairy shag merges multidimensional balayage highlights with an elongated, wolf-inspired tail silhouette. This cut features a distinctly shorter, rounded shaggy top half that tapers down into dramatically thinned, elongated perimeter strands trailing down the back. Warm honey, caramel, and butterscotch highlights are painted strategically onto the upper tier ends and bottom tails, accentuating the disconnected length difference. This sun-kissed look radiates youthful, outdoorsy warmth and high visual dimension, making it ideal for wavy and sun-textured locks during spring and summer months.
To style this highlighted cut, apply a curl-boosting mousse evenly to towel-dried hair, combing through with a wide-tooth comb to ensure uniform distribution. Lean forward and scrunch the hair upward toward the scalp using a microfiber towel to encourage natural wave formation in the crown and elongated tails. Allow the hair to air-dry ninety percent, or speed up the process with a diffuser held on medium heat without disturbing the wave clumps. Once dry, use a flat iron on the lowest heat setting to smooth just the very roots of the crown for a neat contrast against the wavy lengths. Finish by rubbing two drops of golden marula oil between your hands and scrunching the long caramel tails to separate the highlighted ends and add luminous, sun-reflective shine.
 SAVE TO PINTEREST
Layered Coily Fairy Shag with Halo Volume
How to Create
The layered coily fairy shag with halo volume is tailored specifically for type three and type four natural curl patterns, utilizing spherical dry-cutting techniques to construct a weightless halo of curls around the head. By cutting coily hair in its dry, natural state, the stylist creates progressive layers that stack neatly on top of one another, eliminating the heavy downward pull that stretches out tight coils. Shorter crown layers pop upward into a rounded halo, while elongated, hydrated coil tendrils cascade down the back and frame the collarbones. This cut maximizes natural bounce, defines individual curl clusters, and celebrates rich organic volume with stunning structural balance.
Begin styling on freshly washed, soaking-wet coils using the maximum hydration method by layering a rich botanical leave-in cream followed by a flaxseed curl-defining gel. Work in small half-inch sections, using your fingers to rake and smooth the product down each strand before gently twirling individual coils around your finger to encourage uniform clumping. Once all sections are defined, hover a deep-bowl diffuser around your head on low heat to set the gel cast without causing friction frizz. When the hair is one hundred percent dry, coat your hands in raw sweet almond oil and gently scrunch the hardened gel cast to release soft, buoyant coils. Fluff the roots with a wide bamboo hair pick, lifting outward from the scalp to expand the rounded halo silhouette.
 SAVE TO PINTEREST
Common Beginner Mistakes and How to Avoid Them
Styling and maintaining a long fairy shag requires an understanding of how shorter interior layers interact with long perimeter lengths. A frequent mistake made by beginners is using heavy, silicone-dense styling oils and thick conditioning masks on the crown layers. Heavy products weigh down short upper tiers, causing the crown to collapse flat against the head while leaving the bottom lengths looking sparse and stringy. Always choose weightless, water-based volumizing mousses and light texturizing sprays, reserving heavier moisturizing creams strictly for the longest bottom tips.
Another widespread error is over-styling with hot curling irons, creating rigid, polished pageant curls that clash with the relaxed, effortless nature of a fairy shag. To avoid this, always leave the bottom inch of your hair uncurled, use lower temperature settings, and immediately rake through warm curls with your fingers or a wide-tooth comb to break them into soft, undulating waves.
Additionally, many individuals neglect regular perimeter dustings, allowing the delicate, razor-thinned ends to fray into split ends that travel up the hair shaft. Schedule maintenance trims every eight to ten weeks to preserve the crisp separation of the layers and keep your long fairy shag looking fresh, healthy, and intentionally sculpted.
Practical Tips for Better Results
Achieving salon-quality results at home with a long fairy shag depends on smart preparation habits, proper tool handling, and customized texture techniques. Always invest in a high-quality microfiber hair wrap or cotton T-shirt for drying; standard terrycloth towels create aggressive surface friction that disrupts delicate feathered layers and causes unmanageable frizz.
When blow-drying for crown volume, flip your head upside down during the first five minutes of drying to train the root follicles to stand upright, establishing natural, lasting height without heavy backcombing.
To create modern, piecey separation that lasts throughout the day, apply dry texturizing spray in short, targeted bursts directly to the underside of each layer rather than spraying the outer surface.
Furthermore, incorporate silk or satin pillowcases into your nightly routine; sleeping on smooth, low-friction fabrics prevents delicate face-framing tendrils from tangling, breaking, or losing their shaped outward curves overnight.
Finally, if you have naturally fine or straight hair, use a lightweight dry shampoo on clean hair immediately after blow-drying; the micro-powders add essential grit and grip, preventing the airy, tiered layers from slipping flat against your shoulders during daily activities.
Styling, Presentation, or Organization Ideas
Organizing your daily styling routine and presenting a long fairy shag effectively involves curating versatile accessory pairings and maintaining an orderly hair care station. Incorporate whimsical, nature-inspired accessories—such as raw crystal hairpins, delicate brass branch clips, pressed flower barrettes, and sheer chiffon ribbons—to tie back the top layers while letting the long, wispy tiers flow freely down your back.
When setting up your bathroom vanity, organize your styling products into clean acrylic caddies arranged by routine sequence: prep mists and heat protectants first, followed by texturizers, and finishing oils last.
For photo-ready presentation, focus on clothing necklines that complement dynamic layering; fairy shags look exceptionally striking against open-collar peasant tops, boatneck knit sweaters, structured square-neck dresses, and layered delicate chain necklaces that peek through the feathered face-framing tendrils.
When creating half-up hairstyles, pull only the short crown layers into a loose, messy mini-bun or twisted claw clip at the occipital bone, allowing the curtain bangs, sideburn tendrils, and long back tails to frame your face and neck for an effortless, romantic aesthetic.
Budget or Time Planning
Managing a long fairy shag haircut efficiently involves establishing a cost-effective maintenance schedule and adopting streamlined, time-saving styling routines. Allocate your haircare budget strategically by investing in an experienced, precision-trained stylist who specializes in razor cutting and dry texturizing for the initial foundational cut, as an expertly carved shape requires far less daily effort to style.
Save money on salon visits by learning to perform micro-trims on your own curtain bangs and face-framing tendrils using professional-grade hair shears at home between full appointments.
In terms of daily time management, a long fairy shag is designed to reduce styling duration significantly compared to traditional single-length long hair, requiring only ten to fifteen minutes from damp to finished.
To optimize busy weekday mornings, embrace heatless overnight styling methods by sleeping in soft silk wrapping rods or loose braided twists; this allows you to wake up, shake out effortless natural waves, spritz a light texturizing spray through the crown, and step out the door with a polished, enchanting hairstyle that looks intricate and intentionally styled.
Creative Expansion and Advanced Inspiration
Once you have mastered foundational styling for your long fairy shag, explore advanced color customizations and structural adaptations to continually evolve your signature look. Experiment with modern dimensional color placement, such as subtle peek-a-boo panel highlights, pastel watercolor halo rings around the crown, or delicate blonde money pieces that illuminate the face-framing tendrils without requiring full-head bleaching.
For formal celebrations, weddings, or seasonal festivals, practice weaving tiny Dutch accent braids through the mid-layers, leaving the wispy ends loose and embedding small sprigs of dried baby’s breath or delicate seed pearls along the braid line.
You can also explore seasonal styling adaptations by transitioning from airy, sun-kissed sea-salt waves during warm spring and summer months to sleek, polished outward flips and high-gloss finishes during autumn and winter.
For advanced styling, incorporate dual-texture techniques by straightening the crown layers while allowing the bottom tails to remain naturally wavy and textured, creating an editorial, high-fashion contrast. Continually experimenting with your styling techniques, accessories, and hair textures ensures your long fairy shag remains a dynamic, magical, and deeply personal expression of your style.