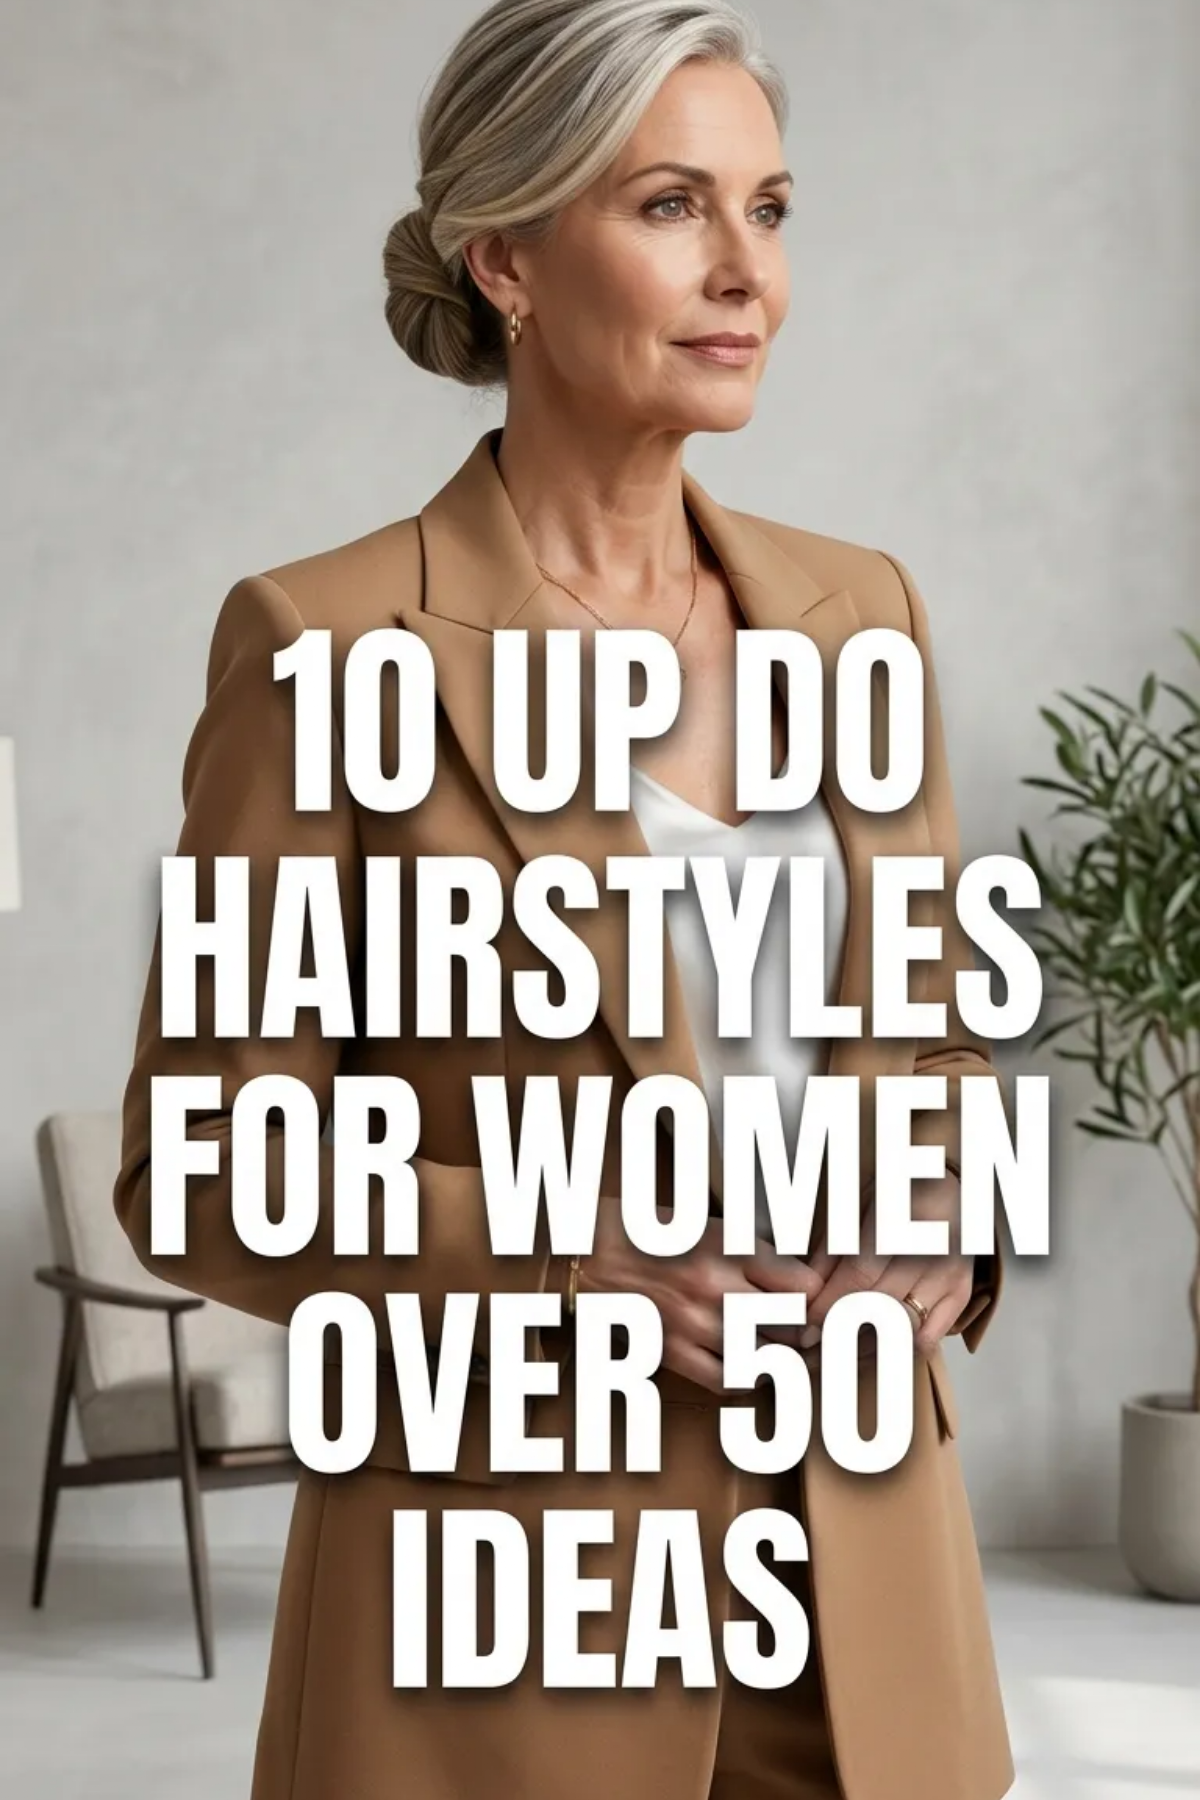
10 Up Do Hairstyles For Women Over 50 Ideas
 SAVE TO PINTEREST
Styling an updo hairstyle after fifty offers an elegant method to highlight facial bone structure, lift the neckline, and create polished looks for formal, professional, or casual settings. As hair texture, strand elasticity, and natural density evolve over time, traditional rigid updos can feel overly severe or place unnecessary tension on delicate follicles. Readers exploring this detailed style guide will gain actionable knowledge regarding crown elevation mechanics, perimeter anchoring, soft face-framing techniques, and secure pin-placement strategies across ten distinct updo concepts. Understanding how strategic back-combing, loose chignons, twisted rolls, and braided foundations interact enables mature women to achieve the optical illusion of fuller, thicker hair while maintaining comfort throughout the day. This guide delivers practical step-by-step methodologies, professional styling equipment checklists, and essential preparation protocols to ensure you can replicate these timeless looks effortlessly at home. Mastering these foundational hair-pinning principles eliminates styling frustration, reduces styling time, and delivers a sophisticated aesthetic that elevates everyday personal style and remains adaptable for galas, weddings, office presentations, and weekend social gatherings.
Why This Idea Is Trending or Useful
Updo hairstyles tailored for women over fifty continue to trend across modern Pinterest inspiration boards because they bridge the gap between timeless elegance, modern design relevance, and everyday practicality. Dense, unlayered long hair or limp fine strands often pull facial features downward due to gravity, accentuating tired lines around the eyes and jaw. An intentionally constructed updo counteracts this downward pull by redistributing hair mass upward to the crown and occipital bone, providing an instant visual lift to the entire face. The DIY appeal and accessibility for beginners stem from the forgiving nature of contemporary undone textures; modern styling embraces soft tendrils, organic twists, and airy volume rather than stiff, lacquer-drenched architectural shapes. Furthermore, these designs embrace a modern minimalist style that requires fewer hot tools and protects fragile mature strands from daily heat exposure and friction damage. By delivering a refined, long-lasting silhouette that flatters natural silver, highlighted, or single-toned hair, updo styling serves as an empowering beauty solution for stylish mature women.
Materials and Preparation
Executing an exceptional updo hairstyle begins with assembling professional-grade styling tools and preparing hair strands to ensure all-day structural hold and texture grip. Essential hardware includes Japanese steel bobby pins, open wave U-pins, seamless snag-free elastic bands, carbon sectioning tail combs, a natural boar-bristle smoothing brush, and alligator sectioning clips. For product prep and thermal protection, gather a lightweight texturizing sea salt spray, a dry root-volumizing powder, a flexible-hold finishing hairspray, and a shine-enhancing dry oil mist. Preparation begins with washing the hair twelve to twenty-four hours in advance using a gentle volumizing shampoo, as freshly washed hair is often too slippery to hold pins securely. Mist a light thermal protectant across damp strands and rough-dry using your fingers to encourage natural cuticle grip and volume. Establishing a clear four-section grid across the crown, left temple, right temple, and nape zones ensures balanced proportions, symmetrical tension control, and clean structural execution.
10 Up Do Hairstyles For Women Over 50 Ideas
Idea 1: Classic French Twist with Crown Softness
Step-by-Step Guide
The classic French twist with crown softness modernizes an iconic vertical updo by incorporating subtle root lift across the top canopy and soft, sweeping side panels. Rather than pulling the hair severely flat against the scalp, this design builds a cushioned foundation along the occipital bone, allowing the hair to roll into a smooth, seam-free cone that elongates the neck. The front and side sections are draped loosely backward to preserve natural movement, preventing the style from looking rigid or dated. This sophisticated silhouette is exceptionally well-suited for black-tie galas, formal corporate ceremonies, and evening wedding celebrations.
To create this updo, start by applying a light dusting of texturizing powder along the crown roots, gently back-combing the top interior panel to establish stable vertical lift. Sweep all the hair smoothly across the back of the head from the left ear to just past the center nape, inserting a vertical row of crisscrossed bobby pins to form a sturdy internal anchor column. Gather the remaining right-side lengths, fold them firmly back over your fingers toward the left, and roll the hair inward into a vertical cylinder that covers the anchor pins. Slide open wave U-pins horizontally into the seam of the twist, anchoring them directly into the crisscrossed base pins. Gently pull a few soft tendrils forward in front of the ears and mist with a flexible-hold hairspray.
+-------------------------------------------------------------+
|             CLASSIC FRENCH TWIST STRUCTURAL MAP             |
+-------------------------------------------------------------+
|  [ Top Canopy: Light Crown Back-Combing for Vertical Lift ] |
|               |                                             |
|  [ Mid-Zone: Vertical Crisscrossed Bobby Pin Anchor Row ]   |
|               |                                             |
|  [ Base Layer: Inward Vertical Seam Rolled Over Pins ]      |
|               |                                             |
|  [ Perimeter: Soft Feathered Tendrils at Temples & Ears ]   |
+-------------------------------------------------------------+
 SAVE TO PINTEREST
Idea 2: Romantic Low Textured Chignon with Face-Framing Tendrils
How to Create
The romantic low textured chignon concentrates organic volume and multidimensional loops at the nape of the neck, accented by delicate wisps that frame the cheekbones. By gathering the hair low at the base of the skull, this updo provides a secure, comfortable weight distribution that does not pull on sensitive scalp areas throughout long events. The main bun is constructed from interlaced, slightly expanded ribbons of hair rather than a tight ball, creating the visual illusion of exceptional hair density and fullness. This hairstyle delivers a graceful, feminine look that complements cocktail dresses, boatneck tops, and tailored formal wear.
Begin by creating a soft center or off-center part, isolating two thin half-inch sections in front of the ears to serve as framing tendrils. Gather the remaining hair into a low, loose ponytail at the nape of the neck, securing it with a clear elastic band. Divide the ponytail tail into two equal halves, twisting each half loosely before wrapping them around the elastic base in opposite directions to form a figure-eight loop. Secure the loops against the head using four to six bobby pins inserted directly into the base. Use your fingertips to gently pull and expand the outer edges of the bun loops for airy dimension, finishing by curling the front framing tendrils with a large-barrel iron on low heat.
 SAVE TO PINTEREST
Idea 3: Gibson Tuck Roll with Crown Volume
Execution Process
The Gibson tuck roll is a vintage-inspired updo that gathers hair into a horizontal roll nestled smoothly along the lower nape. This design utilizes a hidden internal pocket formed by an inverted ponytail, providing a natural cradle that neatly conceals fine, uneven, or split ends. Elevating the crown section before tucking prevents the top of the head from appearing flat, creating a balanced side profile that accentuates high cheekbones. The horizontal line of the roll adds width and substance to narrow facial shapes, making it a reliable, flattering option for business presentations and formal luncheons.
Start by applying a volumizing mousse to the roots and creating a small horizontal horseshoe section at the crown. Back-comb this crown panel lightly with a tail comb to establish height, securing the ends with a mini clear elastic into a half-up ponytail. Gather all the remaining lower hair along with the crown tail into a loose low ponytail at the base of the neck. Create a horizontal opening directly above the lower elastic with your fingers, flip the entire ponytail upward, and pull it down through the opening to form a topsy-turvy loop. Roll the hanging tail upward around your fingers and tuck it securely inside the pocket above the elastic, pinning the roll in place with heavy-duty U-pins.
 SAVE TO PINTEREST
Idea 4: Twisted Crown Halo Updo with Shattered Texture
Setup Method
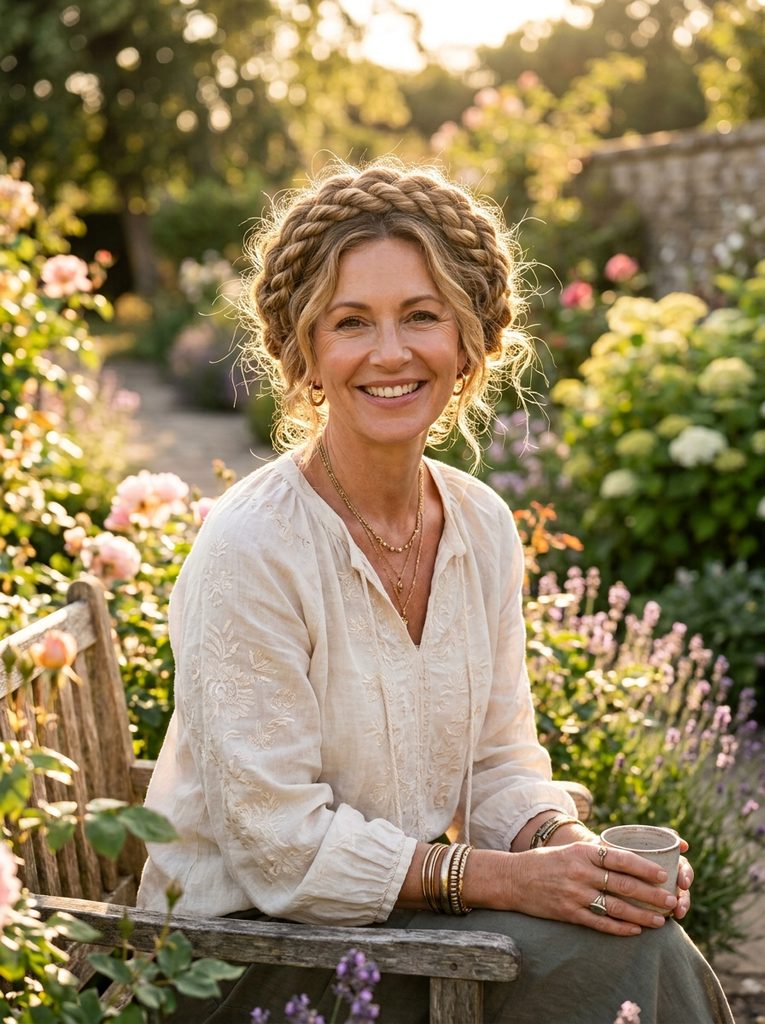
The twisted crown halo updo wraps two textured rope twists around the perimeter of the head, meeting at the back to create an open, ethereal halo effect. This hairstyle distributes hair weight evenly across the entire circumference of the skull, eliminating localized scalp tension while keeping hair entirely off the neck and shoulders. The rope twists are gently loosened and pulled apart after pinning, introducing soft, touchable texture that disguises thinning areas near the crown or temples. This bohemian-inspired updo is ideal for outdoor garden parties, summer weddings, and casual weekend gatherings.
Part the hair down the exact center from the front hairline to the nape, dividing the hair into two equal left and right sections. Take a two-inch subsection from the front left hairline, divide it into two strands, and twist them around each other, incorporating additional hair from along the hairline with each crossover to form a rope twist that travels along the ear to the nape. Repeat the identical rope-twisting technique on the right side, securing both twist ends with small clear elastics. Cross the left twist over the nape to the right side and pin it flat with bobby pins, then cross the right twist over the left to conceal the ends. Pinch and gently pull the twist ridges outward for a full, shattered finish.
 SAVE TO PINTEREST
Idea 5: Elegant Braided Low Bun for Fine Hair
Step-by-Step Guide
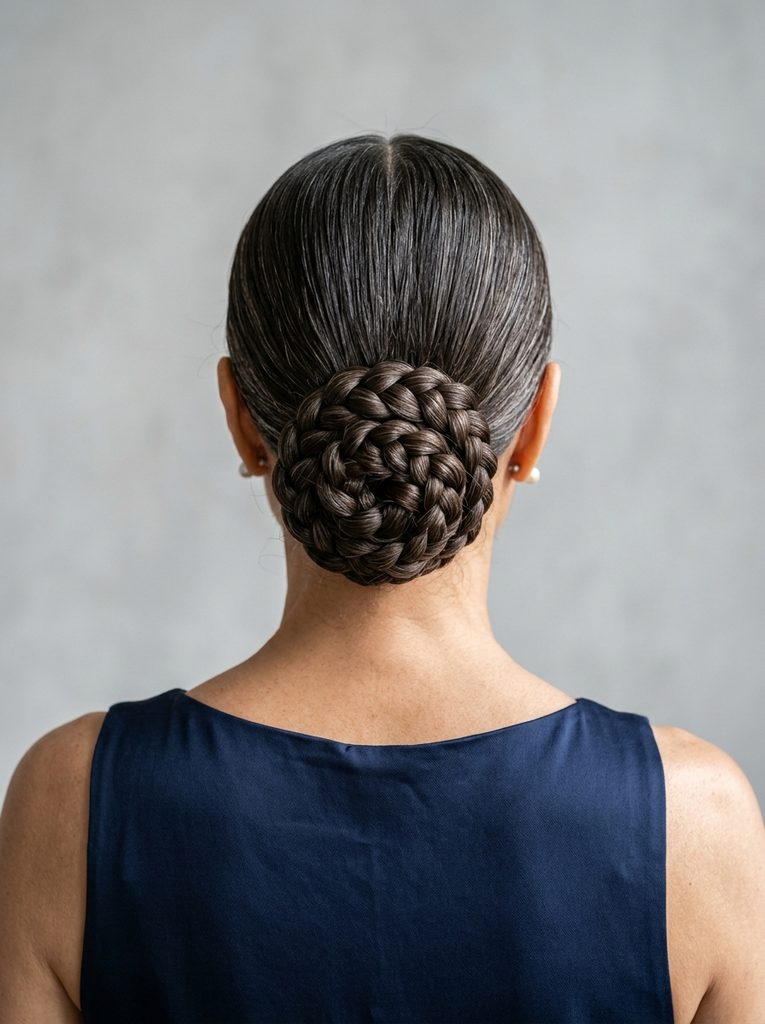
The elegant braided low bun combines the structural stability of a classic three-strand plait with the softness of an expanded low bun, specifically engineered for fine or low-density hair. By braiding the hair before pinning, individual fine strands are interlocked, preventing the bun from falling flat or unraveling during movement. The technique utilizes the “pancaking” method—gently pulling the outer loops of the braid outward horizontally—to triple the visual surface area of the braid before it is coiled. This design delivers a clean, polished look that transitions effortlessly from corporate boardrooms to evening dinner dates.
Begin by smoothing clean, dry hair straight back with a natural boar-bristle brush, misting lightly with texturizing spray for grip. Gather the hair into a neat low ponytail at the center of the nape, securing it firmly with a snag-free elastic band. Braid the ponytail into a standard three-strand plait, fastening the bottom with a clear mini rubber band. Hold the base of the braid with one hand, and use the thumb and forefinger of your other hand to gently pull the outer curves of each braid link outward, widening the plait significantly. Coil the flattened braid flat against the nape around its elastic base in a clockwise spiral, anchoring the perimeter securely with four sturdy bobby pins pushed inward toward the center.
 SAVE TO PINTEREST
Idea 6: Side-Swept Asymmetrical Chignon with Soft Wave Movement
How to Create
The side-swept asymmetrical chignon shifts the focal point of the updo to one side of the neck, creating an artistic, dynamic profile that breaks up facial symmetry. By gathering the bun behind one ear, the style draws the eye diagonally across the jawline and collarbone, producing a slimming and lifting visual effect for round or oval facial contours. Pre-styling the hair with soft, large waves ensures that the sweeping canopy retains rich dimension and light-reflective texture rather than looking flat. This glamorous look is an exceptional choice for photography sessions, anniversary dinners, and charity galas.
Set dry hair with a one-and-a-quarter-inch curling iron, forming loose waves through the mid-lengths and ends before applying a drop of lightweight smoothing oil. Establish a deep side part aligned with the outer arch of your left eyebrow, brushing all the hair smoothly across the nape toward the right earlobe. Secure the gathered hair into a side ponytail behind the right ear using a clear elastic band. Twist the ponytail loosely into a soft knot, allowing the wavy ends to drape naturally over the base, and anchor the perimeter using open wave U-pins. Gently loosen the hair along the left temple with your fingertips to maintain a soft, draped transition across the back of the head.
 SAVE TO PINTEREST
Idea 7: High Textured Bun with Feathered Face-Framing Layers
Execution Process
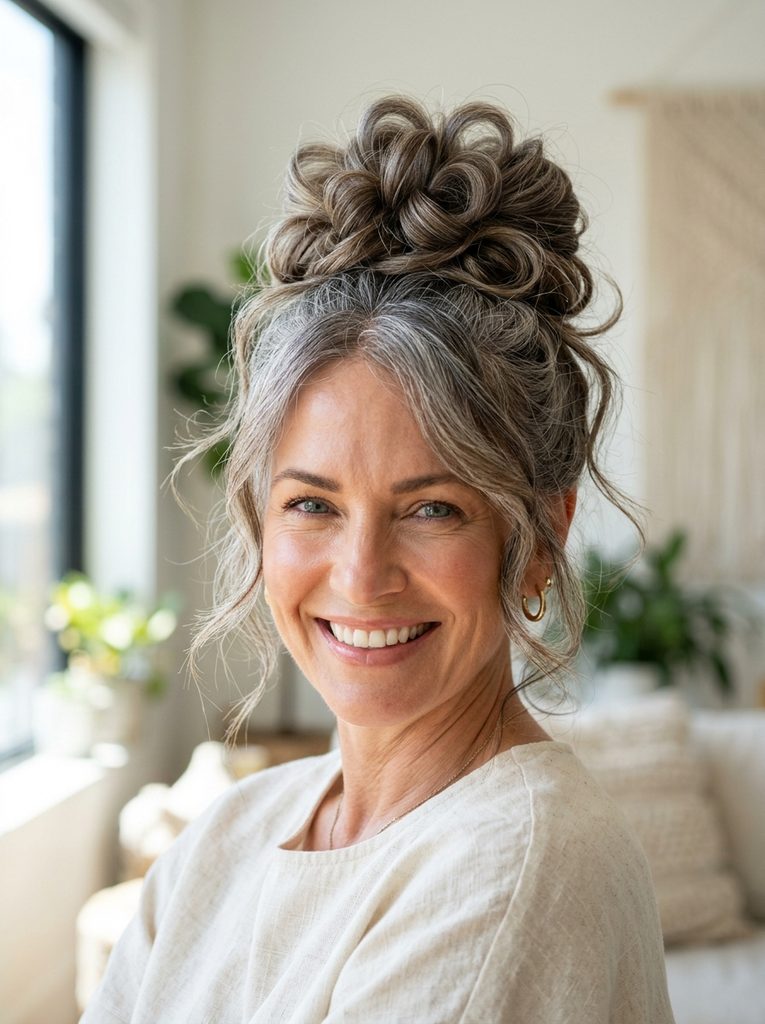
The high textured bun positions voluminous, piecey loops high on the crown, delivering maximum vertical elevation that draws visual focus upward toward the eyes and brow line. By anchoring the updo at the highest point of the head, this style physically lifts the facial silhouette, creating an elongated neck profile and sharp jawline definition. Delicate feathered layers and wispy bangs are left free around the temples and forehead, softening the transition and ensuring the high placement looks effortlessly modern rather than severe. This energetic updo is perfect for warm-weather events, fitness-chic outings, and evening social gatherings.
Begin by flipping your head upside down and gathering all hair smoothly toward the top crown, securing it with a sturdy, snag-free elastic band into a high ponytail. Lightly back-comb the ponytail shaft with a fine-toothed comb to create internal airy volume and texture. Divide the teased ponytail into three smaller ribbons, looping each ribbon loosely backward and pinning the ends around the base with bobby pins to form a multidimensional, petal-like bun. Release your front fringe or pull thin, wispy pieces from the temples and sideburns to soften the perimeter. Finish by spraying the entire updo with a firm-hold finishing mist, using your palms to gently press down any stray flyaways along the rear nape.
 SAVE TO PINTEREST
Idea 8: Soft Banana Clip Updo with Modern Cascade
Setup Method
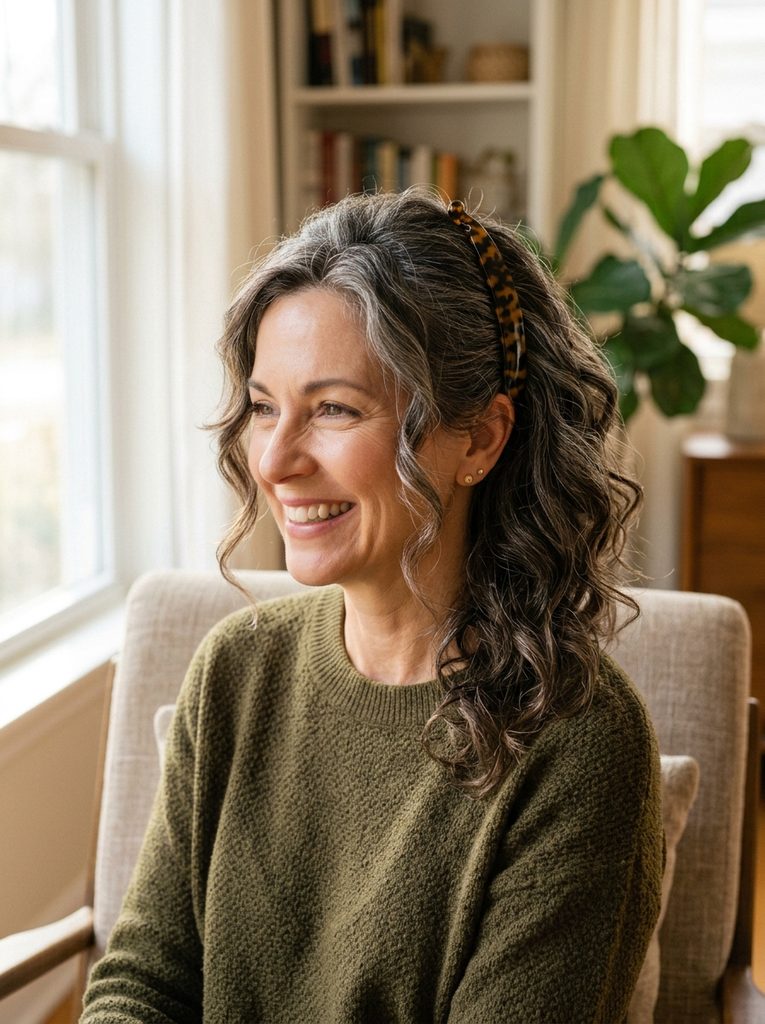
The soft banana clip updo reinterprets a classic 1980s styling accessory through modern texturizing techniques, creating an elongated, vertical cascade of hair that mimics a full, faux-layered updo. The curved teeth of a modern matte banana clip gather hair securely along the vertical seam of the head without creating sharp tension points, making it exceptionally comfortable for sensitive scalps. The hair cascades naturally over the clip, completely concealing the plastic hardware while giving medium-length hair the appearance of dense, overflowing volume. This easy, beginner-friendly style is ideal for busy mornings, casual office days, and weekend brunches.
Apply a generous mist of sea salt spray or texturizing foam to dry, wavy hair, scrunching upward with your hands to build tactile volume and grip. Open a four-to-six-inch matte-finish banana clip, positioning the hinge at the lower nape and sliding the teeth upward on both sides of the head toward the crown. Snap the top clasp shut at the upper occipital bone, ensuring the clip sits flat against the natural curvature of the skull. Use your fingers to fluff and arrange the hair cascading out of the top and sides of the clip, spreading strands across the central seam to hide the teeth entirely. Pull out a few soft tendrils around the ears to complete the relaxed, everyday aesthetic.
 SAVE TO PINTEREST
Idea 9: Modern Sleek Ballerina Knot with Gloss Finish
Step-by-Step Guide
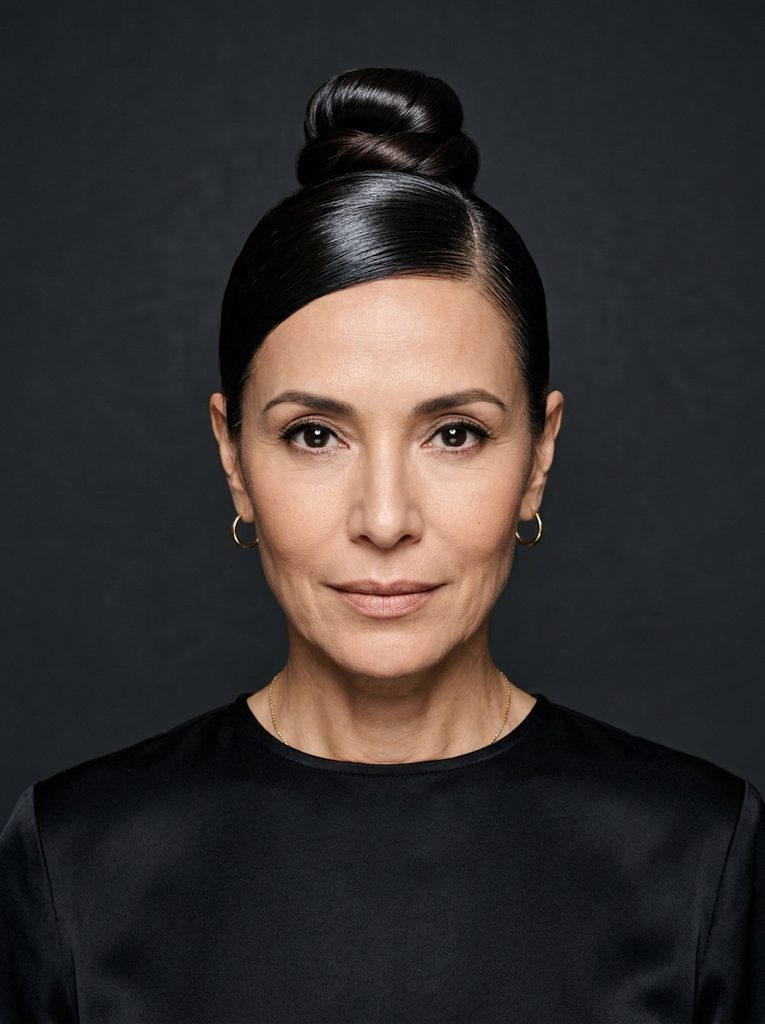
The modern sleek ballerina knot delivers a refined, high-fashion aesthetic characterized by clean, mirror-like strand alignment that wraps tightly into a polished circular knot at the mid-crown. This minimalist design emphasizes clean geometric precision, drawing attention to elegant earrings, refined makeup, and tailored wardrobe collars. The hair canopy is smoothed meticulously using a boar-bristle brush and shine balm, eliminating surface frizz and showcasing rich hair color. This authoritative updo is ideal for executive corporate events, formal architectural galas, and contemporary art exhibitions.
Prepare damp hair with a heat-activated smoothing lotion, blow-drying completely straight with a paddle brush directed downward along the cuticle. Gather all hair into a perfectly centered ponytail positioned midway between the crown and the nape, securing it firmly with an elastic bungee hook for maximum tension control. Smooth a dime-sized amount of high-shine pomade over the head canopy with a natural boar-bristle brush to eliminate stray flyaways. Twist the ponytail tightly into a sleek, rope-like cord, coiling it snugly around the elastic base to form a neat, compact circular donut. Insert six to eight flat bobby pins around the perimeter of the knot to lock it flush against the skull, finishing with a high-gloss aerosol shine spray.
 SAVE TO PINTEREST
Idea 10: Messy Twisted Top Knot with Curtain Fringe
How to Create
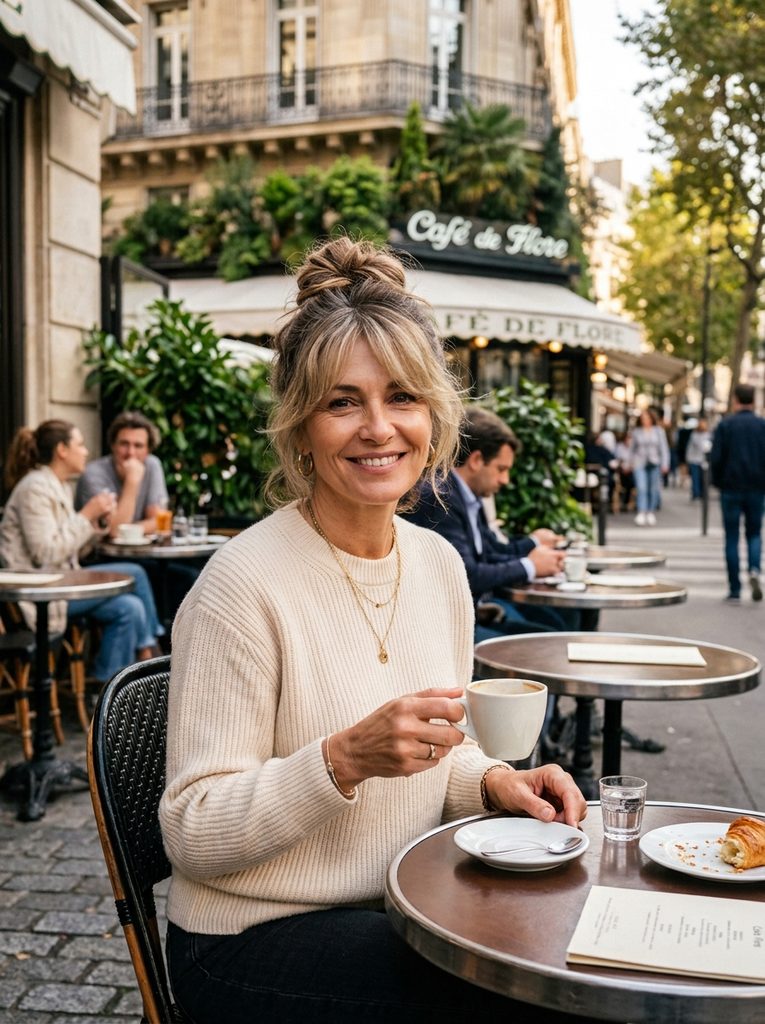
The messy twisted top knot with a curtain fringe combines casual undone texture with soft, face-contouring bangs that part delicately down the center of the forehead. The top knot rests loosely atop the crown, utilizing organic twists and undone loops that provide effortless root lift and casual charm. The curtain bangs open at the bridge of the nose, curving outward to graze the cheekbones, which frames the face and softens mature forehead contours. This versatile wash-and-wear updo is perfect for relaxed work-from-home days, casual coffee dates, and weekend travel.
Isolate your curtain bangs at the front hairline, clipping them forward to keep them separate from the main updo. Gather the remaining hair onto the top of the crown with your hands, avoiding brushes to preserve natural finger-raked texture. Twist the gathered hair loosely around its base, pulling the tail halfway through an elastic band on the final loop to form a relaxed, messy pouf. Use two bobby pins to anchor loose ends loosely against the base without compressing the airy shape. Release the curtain fringe, blow-drying with a mini round brush rolled forward and outward to create the signature curved arch, finishing with a light spritz of dry shampoo for piecey separation.
 SAVE TO PINTEREST
Common Beginner Mistakes and How to Avoid Them
When executing updo hairstyles for women over fifty, several recurring technical errors can compromise the structural longevity, comfort, and flattering nature of the style. One frequent mistake is pulling the hair too tightly back from the forehead and temples, which creates severe, unflattering tension that emphasizes fine lines and can cause traction discomfort. To avoid this, always leave soft crown volume or release delicate, wispy tendrils around the hairline to frame the face with gentle softness. Another common error is attempting to build an updo on freshly washed, slippery hair, which causes pins to slide out and the structure to collapse within hours. Always prepare strands with texturizing powder, dry shampoo, or light sea salt spray to provide essential friction grip for hairpins. Beginners also frequently open bobby pins with their teeth before inserting them, which bends the metal spring and eliminates its clamping tension; always slide bobby pins directly into the hair closed, using the flat side against the scalp and the wavy side facing down to lock hair securely.
Practical Tips for Better Results
Achieving professional, salon-quality results with mature updos relies on proper pin physics, strategic back-combing, and disciplined product layering. Always use open wave U-pins for securing lightweight, expanded loops and delicate rolls, reserving closed bobby pins exclusively for structural anchors and heavy ponytail bases. When back-combing the crown for volume, insert your comb two inches from the scalp and push downward firmly in one continuous stroke, avoiding sawing motions that tangle and damage delicate mature cuticles. To ensure all-day pin security without visible hardware, interlock two bobby pins in an “X” shape inside the foundation of the updo, which creates an immovable internal crossbeam that holds heavy hair effortlessly. At the end of the styling process, hold your finishing hairspray twelve inches away from the head and apply a light, even mist, using the back of your tail comb to smooth rogue flyaways without flattening the textured volume.
+--------------------------------------------------------------------+
|                  UPDO STYLING & PINNING PROTOCOL                   |
+--------------------------------------------------------------------+
|  1. Prep day-old hair with dry texturizing powder for grip.        |
|  2. Build vertical crown lift using gentle single-stroke teasing.  |
|  3. Lock structural bases with crisscrossed "X" bobby pin anchors. |
|  4. Use open wave U-pins to shape and expand exterior loops.       |
|  5. Finish with flexible-hold spray misted from 12 inches away.    |
+--------------------------------------------------------------------+
Styling, Presentation, or Organization Ideas
Styling and organizing your updo tools at home simplifies your morning routine and ensures your hair accessories remain clean and ready for rapid deployment. Store bobby pins, open wave U-pins, and clear elastic bands in compartmentalized acrylic drawer organizers or magnetized magnetic pin dishes to prevent loose pins from scattering across your vanity. Keep specialized styling brushes—including natural boar-bristle smoothing brushes and carbon tail combs—upright in ceramic vanity jars to preserve their bristle alignment. When presenting an updo for special occasions, coordinate delicate decorative accessories—such as pearl-tipped hairpins, tortoiseshell French combs, or minimalist metallic hair cuffs—to accent the roll or bun, placing them along the focal seam of the style. Matching hair accessories with your jewelry and outfit hardware ensures a cohesive, elevated aesthetic that enhances the overall polish of your formal presentation.
Budget or Time Planning
Executing elegant updo hairstyles at home is an economical and time-efficient beauty choice that eliminates the need for expensive salon blowout appointments before major events. A complete, professional-grade updo toolkit—including premium Japanese steel pins, elastic bungee hooks, a boar-bristle brush, texturizing powder, and flexible hairspray—requires an initial one-time investment of thirty to fifty dollars, providing enough supplies for dozens of stunning styles. In terms of time management, mastering these foundational techniques allows you to assemble casual updos, like the banana clip cascade or messy top knot, in under five minutes each morning. More intricate formal styles, such as the classic French twist or romantic textured chignon, require fifteen to twenty minutes of focused prep and pinning once you become familiar with the sectioning steps. Practicing your chosen updo once or twice on a relaxed weekend ensures seamless, stress-free execution on the day of your event.
Creative Expansion and Advanced Inspiration
Once you have mastered the ten foundational updo hairstyles, numerous creative expansions and custom styling variations can elevate your looks even further. Advanced enthusiasts can experiment with integrating subtle, heatless overnight ribbon curls into their prep routine, creating rich, dimensional wave foundations that make updos look exceptionally thick and intricate. Another creative avenue involves incorporating delicate silk scarves or velvet ribbons woven directly into three-strand braids or wrapped around chignon bases, adding luxurious color accents that coordinate with your wardrobe. You can also explore multi-tiered variations, such as combining a Dutch crown braid that transitions into a low Gibson tuck for formal outdoor garden events. As your styling confidence grows, adapting these versatile pinning techniques to your specific hair length, natural texture, and density allows you to create bespoke updos that keep you looking modern, refined, and effortlessly chic at every stage of life.