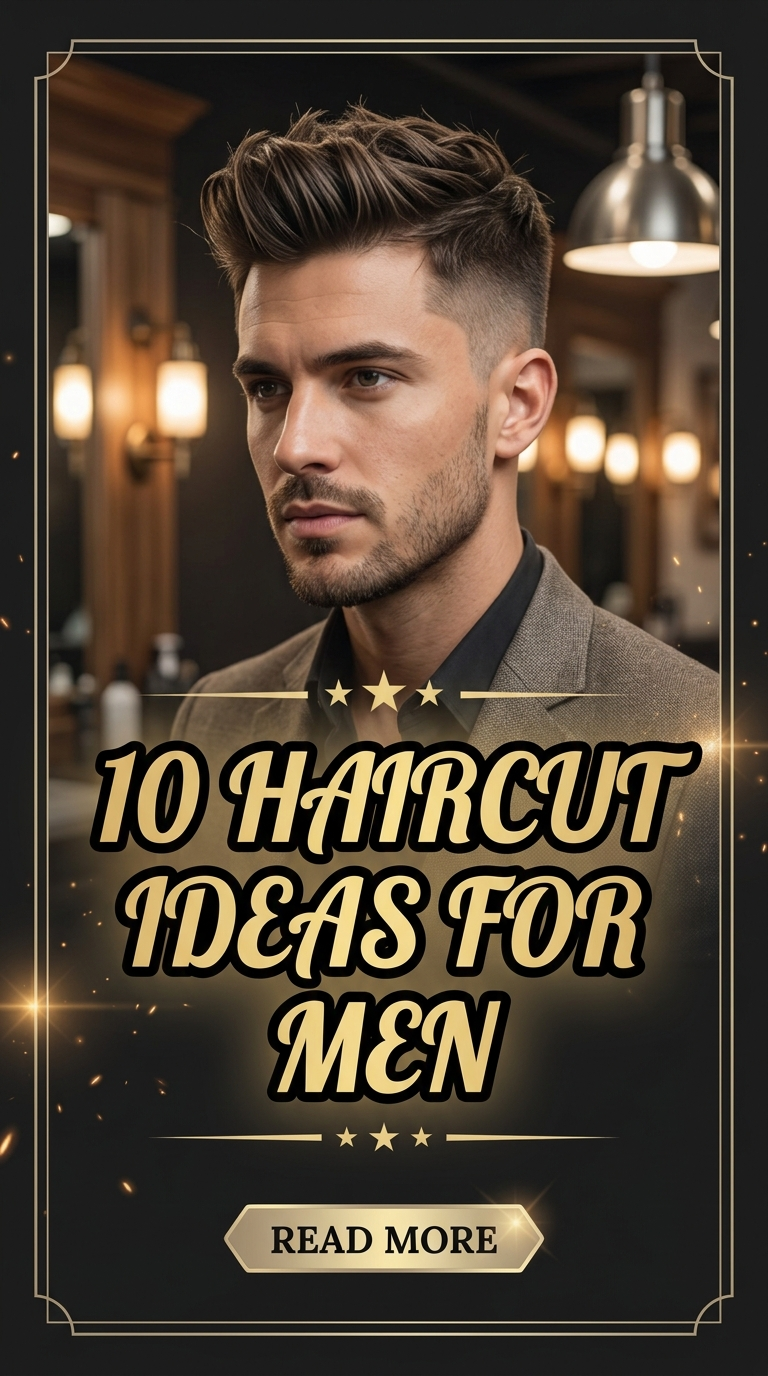
10 Layers Haircut Front Ideas
Introduction
Front layers are a defining element in modern medium and long hairstyles, offering structure, movement, and visual balance without requiring a full haircut transformation. These styles are widely featured across Pinterest ideas because they allow subtle yet effective changes that enhance facial features while maintaining overall hair length. Front layering focuses on shaping the hair around the face, making it a practical and versatile approach for those seeking a fresh and updated appearance.
This article presents ten detailed and beginner friendly front layer haircut ideas, each explained with clear concepts and step by step guidance. Readers will learn how different layering techniques work, how to prepare the necessary materials, and how to execute each style with precision. The focus remains on practical application, ensuring that each idea can be followed as a DIY tutorial without requiring advanced skills.
Front layers also align with modern design and minimalist style preferences, where clean structure and intentional shaping create a refined look. These creative ideas are useful for anyone interested in enhancing their hairstyle with manageable, aesthetic, and realistic techniques.
Why This Idea Is Trending or Useful
Front layered haircuts continue to gain popularity due to their adaptability and functional design. They provide a simple way to update a hairstyle without significant length reduction, making them accessible for a wide range of users. On Pinterest, these styles are categorized among trending ideas because they combine visual appeal with practicality.
One of the main reasons for their popularity is their ability to frame the face effectively. By adjusting the length and angle of the front layers, individuals can create balance and enhance facial structure. This makes front layers suitable for different face shapes and hair types. Additionally, these styles require minimal maintenance compared to full layered cuts, making them an easy project for beginners.
The DIY appeal is also a key factor. With basic tools and proper planning, front layers can be created at home using clear tutorial methods. This aligns with the growing interest in self-managed beauty routines and budget ideas. The combination of accessibility, customization, and aesthetic value ensures that front layered haircuts remain a consistent source of inspiration in modern styling trends.
Materials and Preparation
Proper preparation is essential for achieving clean and balanced front layers. The basic materials required include sharp hair cutting scissors, a fine-tooth comb, sectioning clips, a spray bottle for dampening hair, and a mirror setup that allows clear visibility from multiple angles. These tools support accuracy and help maintain control throughout the process.
Preparation begins by washing the hair and ensuring it is slightly damp. Damp hair allows for more precise sectioning and cutting. Detangle the hair completely using a comb to prevent uneven results. Next, separate the front portion of the hair from the rest. This section typically includes the hair from temple to temple, forming a triangular shape at the front.
Planning is a critical step. Decide the desired length and angle of the layers before cutting. Using visual references from Pinterest ideas can help guide the design. Mark the intended cutting points mentally or with clips to maintain consistency. Ensure proper lighting and a stable working environment to avoid distractions.
Organizing tools and maintaining a structured approach improves efficiency and reduces errors. Careful preparation ensures that the final result appears balanced, smooth, and aligned with the intended style.
Idea 1: Soft Face-Framing Front Layers
How to Create
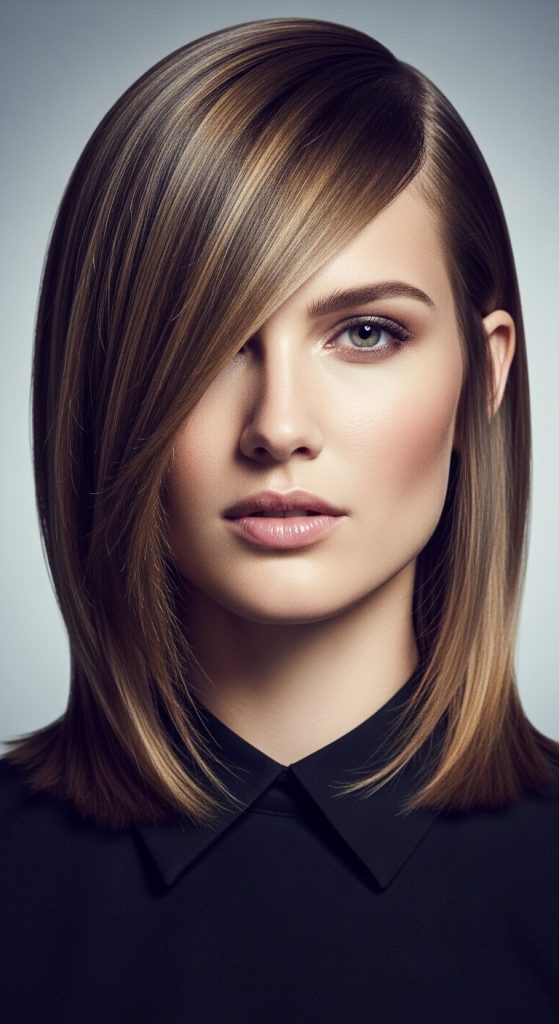
Soft face-framing front layers are designed to gently contour the face while maintaining a natural flow. This style focuses on gradual transitions rather than sharp cuts, making it suitable for a wide range of hair textures. The layers begin slightly below the chin and blend smoothly into the rest of the hair, creating a balanced and lightweight appearance.

This approach is commonly used in Pinterest inspiration boards because it enhances facial features without requiring dramatic changes. It works well for both casual and professional settings, making it a practical option for everyday styling. The soft structure also aligns with minimalist style trends, where subtle detailing creates a refined aesthetic.
To create this look, section the front portion of the hair and comb it forward. Hold the hair at a slight angle and cut gradually downward, starting from the shortest point near the chin. Use point cutting techniques to soften the edges and avoid harsh lines.
Blend the layers into the rest of the hair by trimming small sections at a time. Check symmetry frequently using a mirror. This step-by-step method ensures a smooth and natural finish that remains easy to maintain.
Idea 2: Curtain Front Layers
Step-by-Step Guide

Curtain front layers are structured to part naturally in the center, creating a symmetrical frame around the face. This style features longer layers that sweep outward, forming a soft opening effect. It is widely recognized in trending ideas due to its versatility and compatibility with various hair lengths.
The design focuses on balance and movement. The layers are not overly short, allowing them to blend seamlessly with the rest of the hair. This creates a cohesive look that works well with both straight and wavy textures. The style is often associated with aesthetic and modern design trends that emphasize natural flow.
To achieve this look, section the front hair evenly down the middle. Determine the starting length, typically around the cheekbone or jawline. Cut each side at a slight angle, moving outward from the center part.
Use point cutting to soften the edges and ensure a gradual transition. Style by parting the hair in the center and allowing the layers to fall naturally. This method creates a balanced and structured appearance suitable for everyday wear.
Idea 3: Short Front Layers with Volume
How to Make
Short front layers are designed to add volume and lift near the face. This style involves cutting shorter sections at the front while maintaining longer lengths in the back. The contrast creates a dynamic structure that enhances fullness and movement.
This approach is particularly useful for individuals with flat or fine hair, as it introduces height and dimension. It is commonly featured in creative ideas that focus on adding texture without complex styling techniques. The result is a more defined and lively appearance.

To create this style, section the front hair and lift it slightly upward. Cut shorter layers starting above the cheekbone. Ensure the cuts are gradual to maintain a natural transition.
Blend the shorter layers into the longer sections using light trimming techniques. Avoid removing too much length at once. This step-by-step process ensures a balanced result while maintaining control over the final shape.
Idea 4: Angled Front Layers
Execution Process
Angled front layers focus on creating a diagonal shape that starts shorter near the face and gradually lengthens toward the back. This style introduces structure and direction, making it a strong choice for modern and organized hairstyles.
The angled design helps elongate the face and create a defined silhouette. It works well with straight and slightly wavy textures and can be adjusted to achieve subtle or more pronounced effects. The structured appearance aligns with minimalist and modern design preferences.
To achieve this look, section the front hair and determine the angle of the cut. Begin cutting at the shortest point near the front and gradually extend the length as you move backward.
Maintain consistency by checking both sides frequently. Blend the layers into the rest of the hair using precise trimming. This method ensures a clean and balanced finish.
Idea 5: Wispy Front Layers

How to Create
Wispy front layers are characterized by light, feathered ends that create a soft and airy appearance. This style focuses on reducing bulk while maintaining movement and flow. It is commonly used in aesthetic Pinterest ideas that emphasize delicate detailing.
The layers are thin and subtle, making them suitable for individuals who prefer a natural look. This approach works well with various hair textures and can be combined with other styles for added versatility.
To create this look, section the front hair and use point cutting to create fine, feathered edges. Avoid straight cuts to maintain the wispy effect.
Blend the layers carefully into the rest of the hair. Use minimal trimming to preserve length. This step-by-step method produces a soft and lightweight result.
Idea 6: Layered Fringe Front Cut
Step-by-Step Guide
A layered fringe front cut combines short front layers with a structured fringe. This style creates a defined frame around the face while adding texture and depth. It is often seen in trending ideas that focus on bold yet manageable designs.

The fringe is slightly layered to avoid heaviness, allowing it to blend naturally with the rest of the hair. This creates a cohesive look that remains easy to style.
To achieve this style, section the fringe area and cut to the desired length. Add light layers using point cutting techniques.
Blend the fringe into the front layers by trimming small sections. Ensure the transition is smooth and balanced. This method creates a structured yet flexible hairstyle.
Idea 7: Long Blended Front Layers

How to Make
Long blended front layers maintain length while adding subtle shaping around the face. This style focuses on smooth transitions and minimal contrast. It is ideal for those seeking a natural and understated look.
The layers begin lower on the hair, creating a gentle curve that enhances flow. This approach aligns with minimalist style preferences and works well for everyday wear.
To create this look, section the front hair and cut at a slight angle starting below the chin. Blend the layers gradually into the rest of the hair.
Use light trimming techniques to maintain smoothness. This step-by-step process ensures a cohesive and balanced result.
Idea 8: Curved Front Layers
Execution Process

Curved front layers are shaped to follow the natural contour of the face. This style creates a rounded appearance that enhances softness and balance. It is commonly used in aesthetic hairstyles that focus on harmony and flow.
The layers are designed to curve inward, framing the face gently. This approach works well with various hair textures and can be styled easily.
To achieve this look, section the front hair and cut in a curved motion. Maintain consistent angles to ensure symmetry.
Blend the layers into the rest of the hair using precise trimming. This method creates a smooth and polished finish.
Idea 9: Textured Front Layers
How to Create

Textured front layers introduce variation in length to create movement and depth. This style focuses on adding dimension without removing too much volume. It is commonly featured in creative project ideas that emphasize individuality.
The layers are uneven but controlled, creating a balanced yet dynamic appearance. This approach works well for medium and long hair lengths.
To create this style, section the front hair and use point cutting to create varied lengths. Avoid uniform cuts to maintain texture.
Blend the layers lightly into the rest of the hair. This step-by-step method ensures a cohesive and natural result.
Idea 10: Minimalist Straight Front Layers
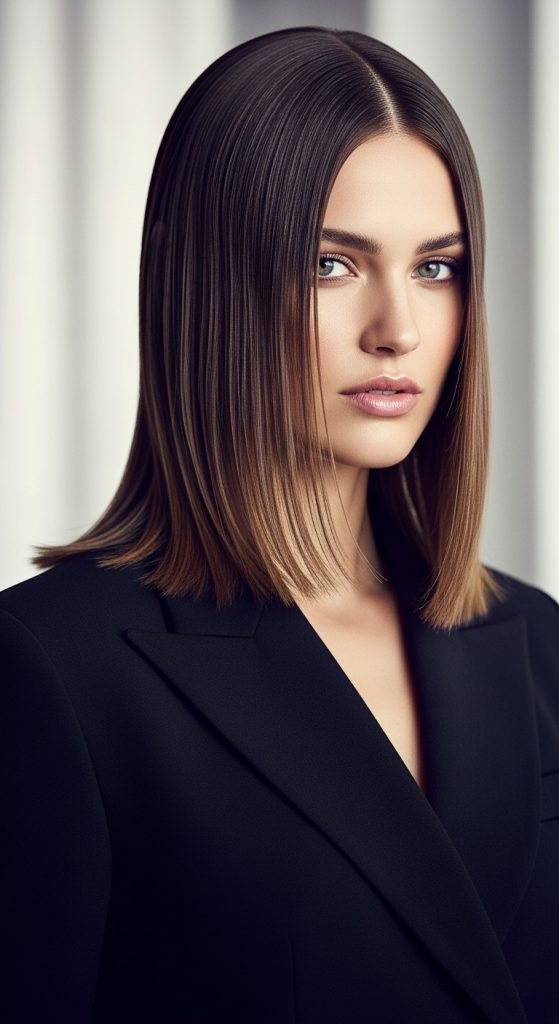
How to Make
Minimalist straight front layers focus on clean, subtle shaping with minimal variation. This style emphasizes simplicity and precision, making it suitable for modern design aesthetics.
The layers are barely noticeable but provide enough structure to frame the face. This approach is ideal for those who prefer a clean and organized look.
To create this style, section the front hair and cut straight with slight angling near the ends. Maintain consistency throughout the process.
Refine the layers with light trimming to ensure smoothness. This method produces a polished and understated finish.
Common Beginner Mistakes and How to Avoid Them
A common mistake is cutting uneven layers due to improper sectioning. Always divide the hair clearly before starting. Another issue is cutting too much length at once, which reduces control. Gradual trimming helps maintain accuracy. Using incorrect angles can also affect symmetry, so consistent positioning is important.
Skipping preparation steps such as detangling or dampening hair often leads to uneven results. Regularly checking both sides in a mirror ensures balance. Maintaining focus and following a structured approach reduces errors.
Practical Tips for Better Results
Work in a well-lit area to improve visibility and precision. Use sharp scissors for clean cuts. Comb the hair frequently during the process to maintain alignment.
Follow reference images for guidance and consistency. Make small adjustments instead of large cuts to improve control. Patience and careful planning lead to better results.
Styling, Presentation, or Organization Ideas
Organize tools before starting to maintain efficiency. Keep the workspace clean and structured. Style the front layers using minimal techniques to highlight their natural shape.
Coordinate the hairstyle with overall appearance for a cohesive look. Consistent styling enhances the aesthetic value.
Budget or Time Planning
Front layered haircuts require minimal materials, making them suitable for budget ideas. Basic tools are sufficient for most styles. Time planning is important to avoid rushing.
Simple styles can be completed quickly, while detailed layering requires more time. Proper planning ensures a smooth process.
Creative Expansion and Advanced Inspiration
Front layers can be combined with other haircut styles to create unique variations. Adding texture or adjusting angles enhances customization.
Advanced inspiration includes experimenting with different layering depths and shapes. This allows for personalized results while maintaining structure.