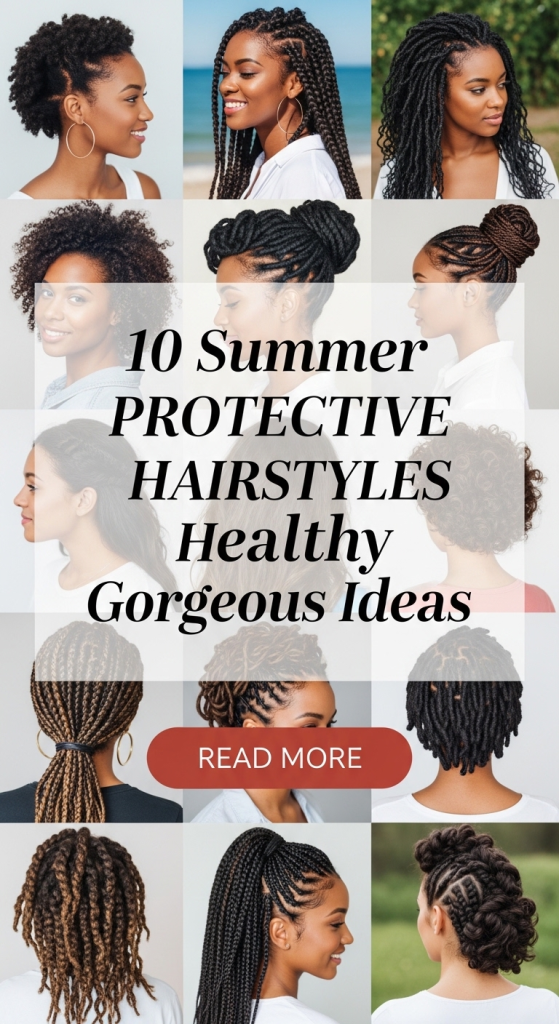
10 Summer Protective Hairstyles Healthy Gorgeous Ideas
Summer protective hairstyles are designed to maintain hair health while ensuring a polished and manageable appearance during warm weather. In modern Pinterest ideas, protective styling focuses on reducing daily manipulation, minimizing exposure to heat and humidity, and preserving moisture. These hairstyles are structured to protect the ends of the hair, which are more prone to damage, while also supporting a neat and aesthetic look suitable for different occasions. Protective styles are not only functional but also serve as creative ideas that reflect personal style through patterns, textures, and structured designs.
This article provides a complete guide to 10 summer protective hairstyles that combine practicality with visual appeal. Readers will learn how to prepare their hair, organize materials, and follow step by step methods to achieve each look. The focus remains on beginner friendly techniques that can be adapted based on hair type and length. Each hairstyle is presented as a creative project that supports both organization and long-term hair care. By following these methods, it becomes possible to maintain healthy hair while achieving a consistent and stylish appearance throughout the summer season.
Why This Idea Is Trending or Useful
Summer protective hairstyles are trending because they address common challenges associated with heat, humidity, and frequent styling. Pinterest inspiration highlights styles that reduce breakage, maintain moisture, and provide long-lasting results. These hairstyles are practical because they limit daily handling of the hair, which helps prevent damage and supports overall hair health.
The design relevance of protective styles lies in their ability to combine structure with aesthetic detail. Clean parts, defined patterns, and consistent texture contribute to a modern design that aligns with current trends. The DIY appeal of these styles makes them accessible to a wide audience. Step by step tutorials allow individuals to recreate styles at home without requiring professional assistance.
Accessibility is another key factor. Many protective hairstyles use simple materials and tools, making them suitable for beginners. These styles are adaptable and can be customized based on personal preferences. The combination of functionality, creativity, and ease of execution makes protective hairstyles a consistent feature in trending ideas across home decor and personal styling platforms.
Materials and Preparation
Proper preparation is essential for achieving effective protective hairstyles. Start by washing and conditioning the hair to create a clean and hydrated base. Detangle thoroughly using a wide-tooth comb to reduce breakage during styling. Section the hair into manageable parts to improve organization and accuracy.
Common materials include hair ties, clips, combs, and pins for sectioning and securing the hair. Moisturizing products help maintain hydration, while lightweight styling products can improve hold. Protective accessories such as scarves or wraps are useful for maintaining the hairstyle after completion.
Preparation also involves planning the structure of the hairstyle. Decide on section sizes, parting patterns, and overall design before starting. This ensures consistency throughout the process. Organizing materials in advance helps maintain a smooth workflow and reduces interruptions. Proper lighting and mirror placement improve visibility and accuracy. By following these preparation steps, each hairstyle becomes easier to execute and maintain, ensuring both durability and a balanced aesthetic.
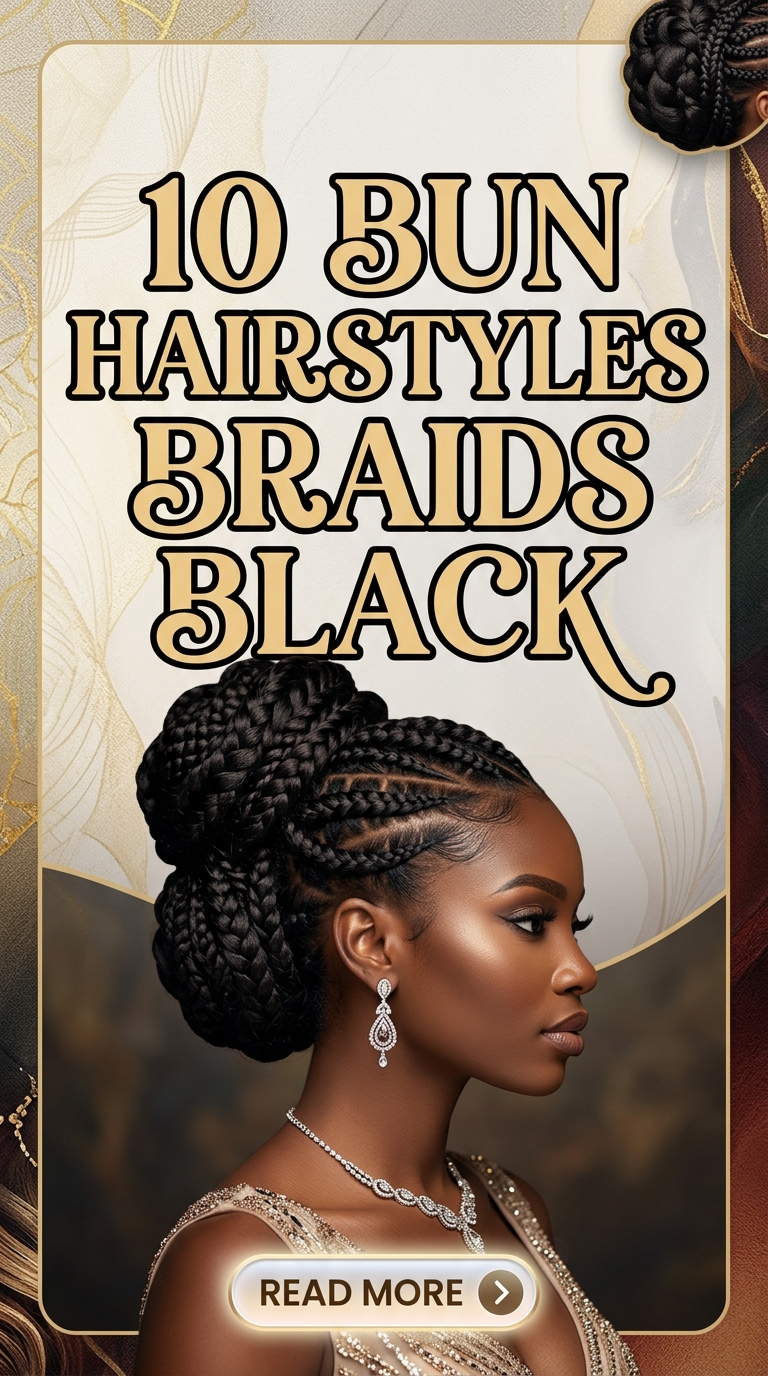
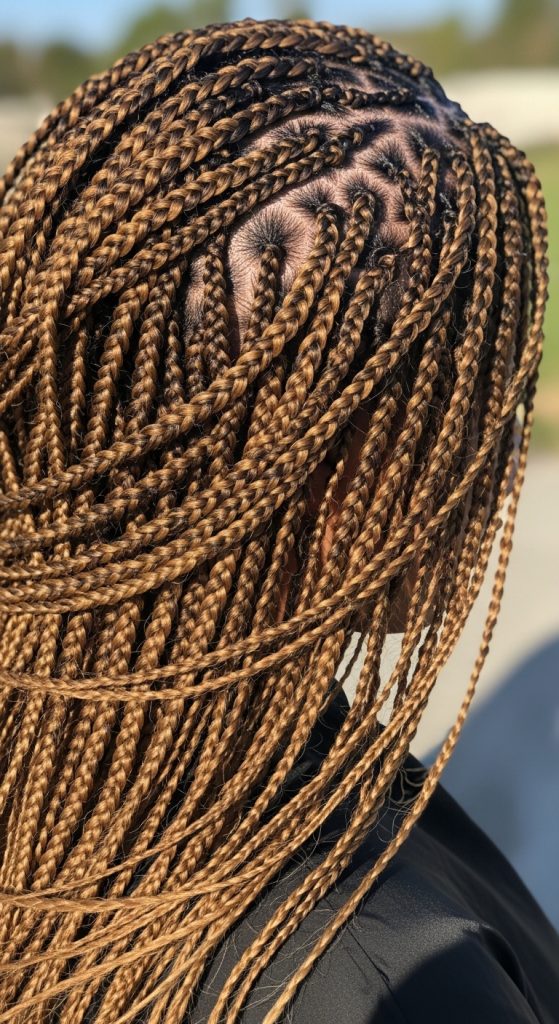
Idea 1: Classic Box Braids Protective Style
How to Create
Classic box braids are a widely used protective hairstyle that involves dividing the hair into square sections and braiding each part individually. This style provides long-term protection by reducing daily manipulation and shielding the hair from environmental stress. It is particularly suitable for summer because it helps maintain moisture and reduces exposure to humidity.
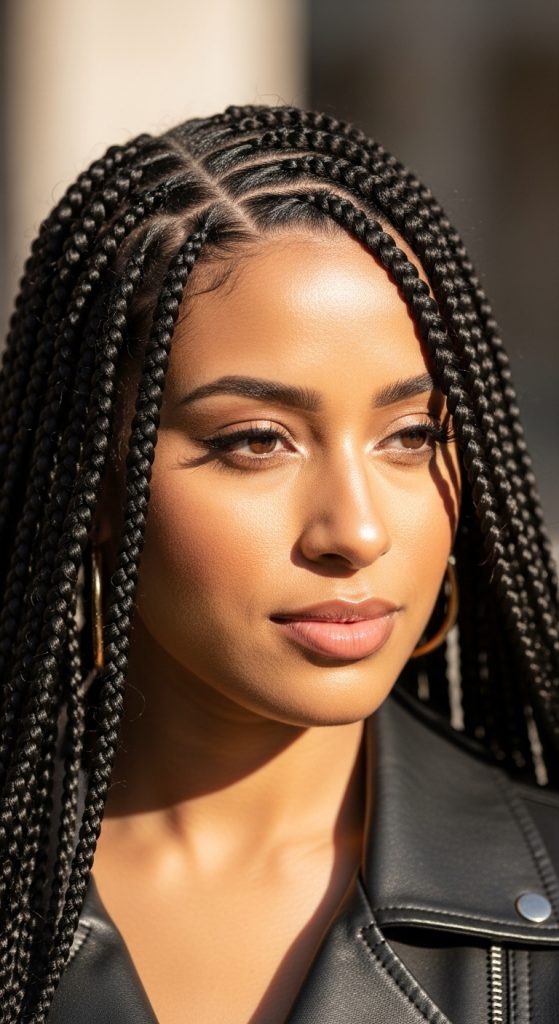
The structured pattern creates a clean and organized appearance, aligning with modern design trends. Box braids also allow flexibility in length and thickness, making them adaptable to different preferences.
Step-by-Step Guide
Start by sectioning the hair into evenly sized squares. Use clips to keep sections separate and organized. Begin braiding each section from the roots, maintaining consistent tension.
Continue braiding to the ends and secure each braid. Repeat the process across the entire head. This step by step method creates a durable and balanced hairstyle suitable for extended wear.
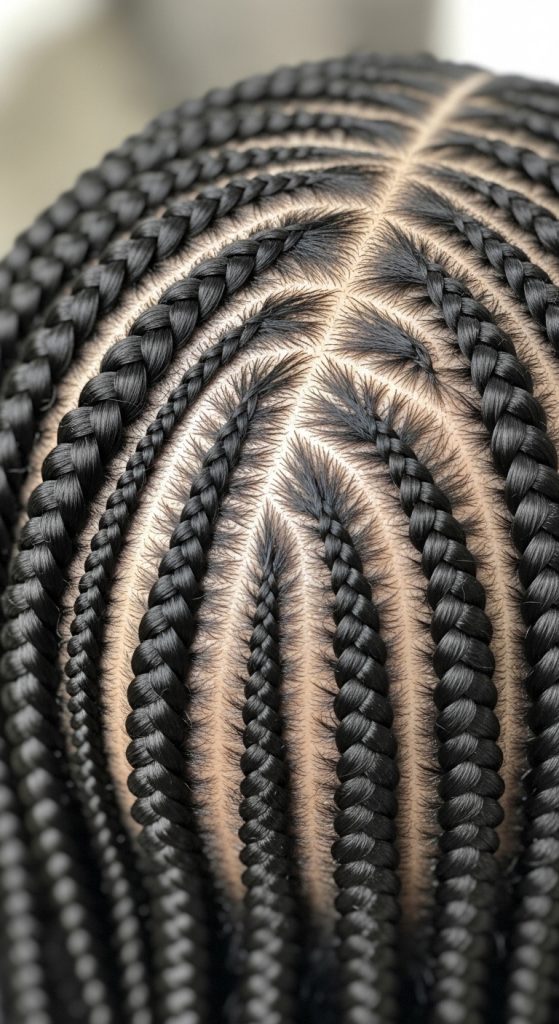
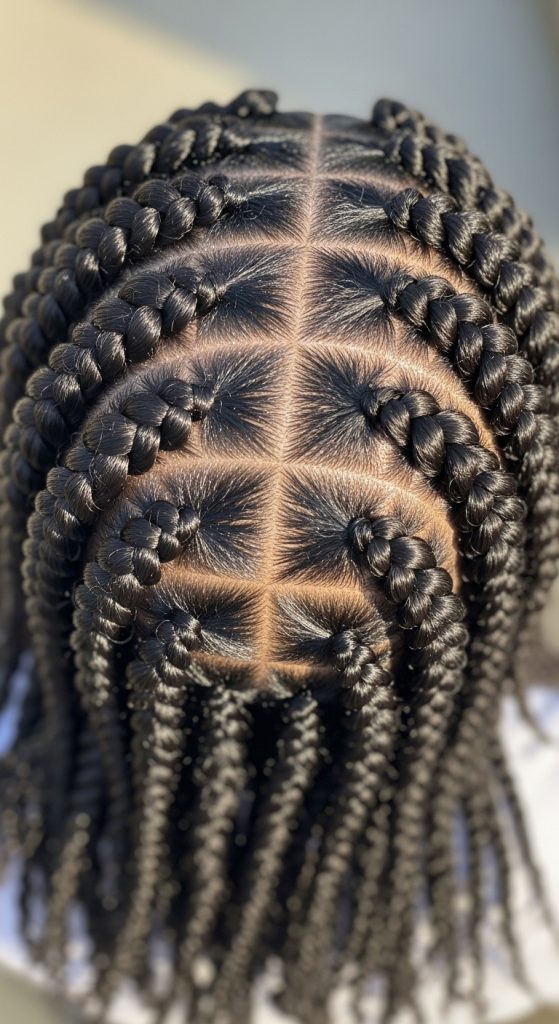
Idea 2: Cornrows Close-to-Scalp Style
How to Create
Cornrows involve braiding the hair close to the scalp in defined patterns. This style provides strong hold and reduces tangling, making it effective for protective styling.
The design can include straight lines or creative patterns, offering flexibility while maintaining structure.
Execution Process
Divide the hair into sections based on the desired pattern. Begin braiding each section close to the scalp, adding hair gradually.
Maintain consistent tension for even results. Secure the ends and repeat for all sections. This creates a neat and long-lasting style.
Idea 3: Two-Strand Twists Natural Style
How to Create
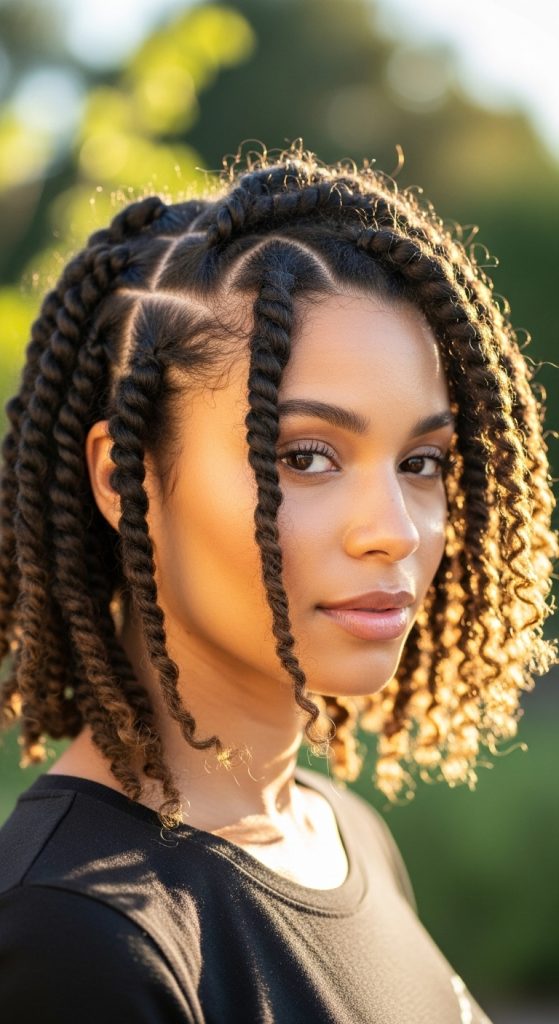
Two-strand twists involve dividing the hair into sections and twisting two strands together. This style enhances natural texture while providing protection.
It is suitable for maintaining moisture and reducing breakage.
Step-by-Step Guide
Section the hair and divide each part into two strands. Twist them together evenly.
Secure the ends and repeat across the head. This creates a simple and effective protective style.
Idea 4: Bantu Knots Protective Setup
How to Create
Bantu knots involve twisting sections of hair and wrapping them into small knots. This style provides both protection and a structured appearance.
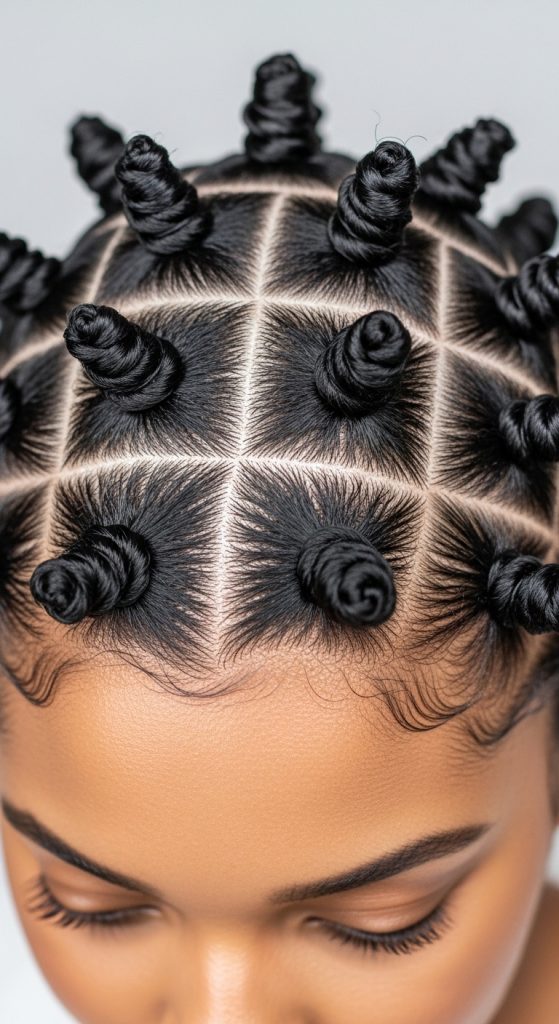
It is suitable for creating defined patterns and maintaining hair health.
How to Make
Section the hair and twist each part. Wrap the twist around itself to form a knot.
Secure each knot and repeat the process. This creates a durable and organized hairstyle.
Idea 5: Flat Twists Design Style
How to Create
Flat twists are similar to cornrows but use a twisting technique instead of braiding. This style provides a softer appearance while maintaining protection.
It is suitable for creating clean and structured designs.
Execution Process
Divide the hair into sections and twist each part close to the scalp. Add hair gradually as you move along.
Secure the ends and repeat for all sections. This creates a balanced and protective style.
Idea 6: High Puff Natural Protective Look
How to Create
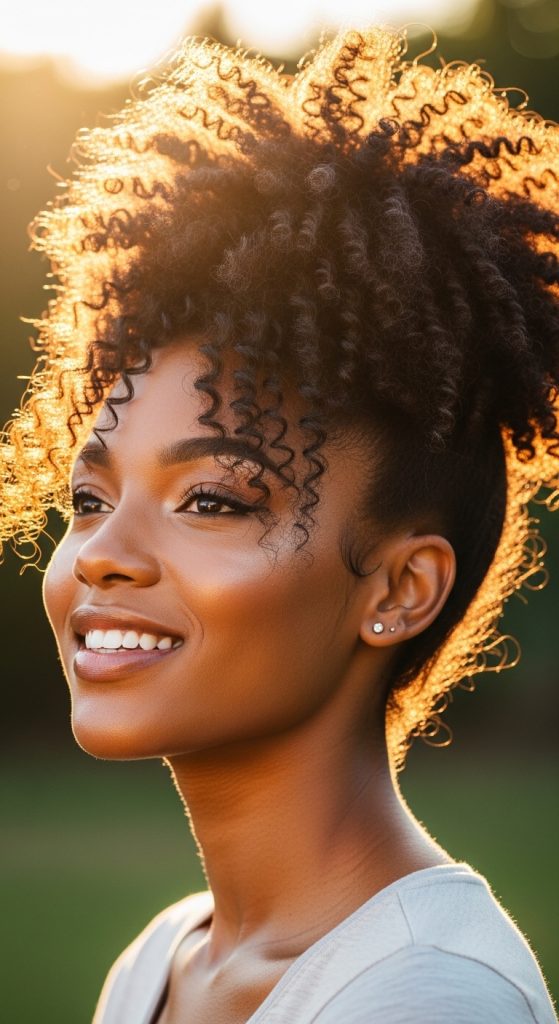
The high puff gathers natural hair into a puff at the crown, providing volume while protecting the ends. This style is simple and beginner friendly.
It highlights natural texture and requires minimal manipulation.
Step-by-Step Guide
Brush the hair upward and secure it with a band. Adjust the puff for even volume.
Smooth the edges for a clean finish. This creates a balanced and comfortable style.
Idea 7: Crochet Braids Protective Method
How to Create
Crochet braids involve attaching pre-braided or twisted extensions to cornrowed hair. This style provides versatility and reduces styling time.
It is suitable for achieving a variety of looks while maintaining protection.
How to Make
Create cornrows as a base. Use a crochet tool to attach extensions.
Ensure even distribution and secure attachment. This creates a full and protective hairstyle.
Idea 8: Halo Braid Crown Style
How to Create
The halo braid wraps around the head, creating a crown-like appearance. This style provides full protection while maintaining a structured look.
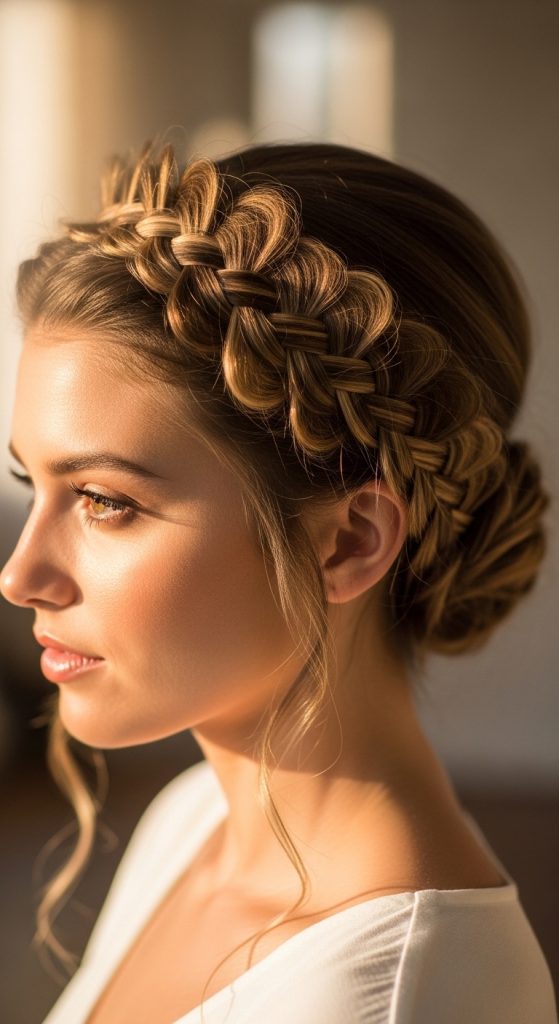
It is suitable for formal and casual settings.
Execution Process
Create a braid starting from one side and wrap it around the head. Secure with pins.
Adjust for symmetry and balance. This creates a polished and protective style.
Idea 9: Low Bun Protective Style
How to Create
The low bun gathers hair at the nape and secures it into a compact bun. This style protects the ends and maintains a neat appearance.
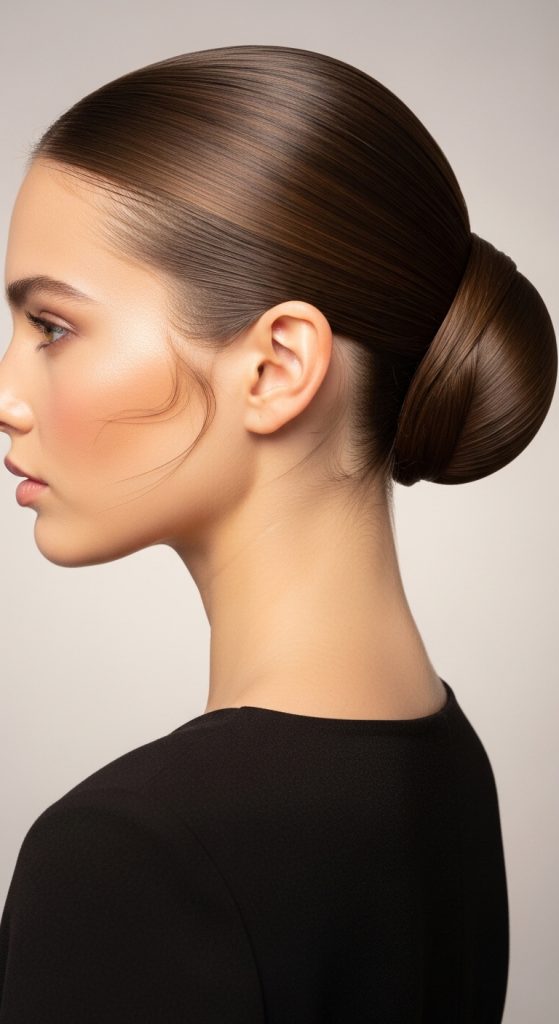
It is suitable for everyday wear.
Step-by-Step Guide
Brush the hair back and secure it into a low ponytail. Twist and wrap the ponytail into a bun.
Secure with pins and adjust for symmetry. This creates a simple and effective protective style.
Idea 10: Braided Ponytail Protective Design
How to Create
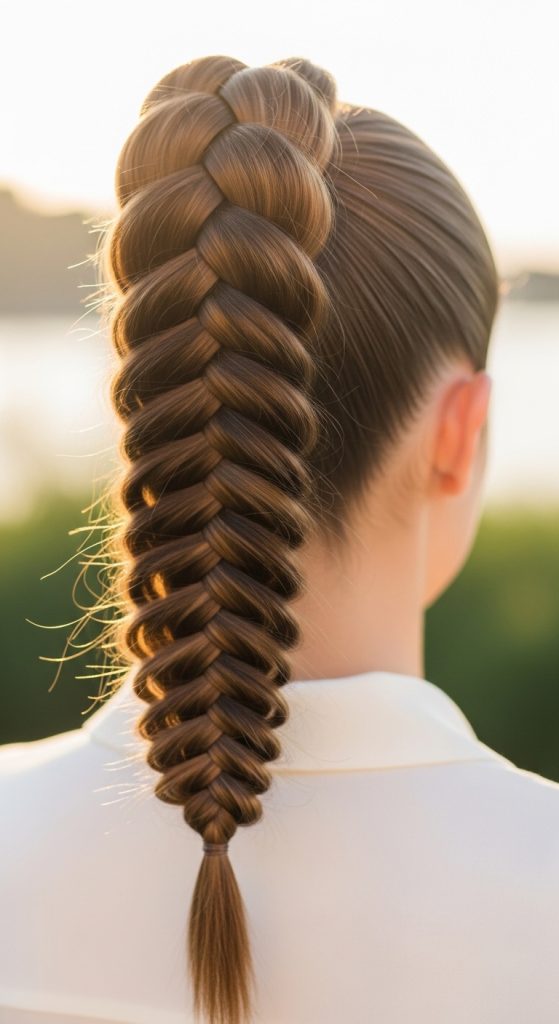
The braided ponytail combines braiding with a ponytail structure, creating a secure and durable hairstyle. This style protects the hair while adding length and structure.
It is suitable for active environments.
Setup Method
Create a ponytail and divide it into sections. Braid each section evenly.
Secure the ends and adjust for balance. This creates a strong and visually appealing style.
Common Beginner Mistakes and How to Avoid Them
One common mistake is skipping proper preparation, which can lead to uneven sections and reduced durability. Ensuring clean and detangled hair improves results. Another issue is applying excessive tension, which can cause discomfort and damage. Maintaining moderate tension ensures both comfort and effectiveness. Inconsistent section sizes can affect the overall appearance, so using a comb for precise parting is important. Neglecting moisture can also impact hair health, making proper conditioning essential before styling.
Practical Tips for Better Results
Keep hair moisturized to maintain flexibility and reduce breakage. Use consistent sectioning for balanced results. Practice step by step techniques to improve accuracy. Maintain organized tools for efficient styling. Adjust methods based on hair type and length.
Styling, Presentation, or Organization Ideas
Maintain clean parts and structured patterns for a polished look. Combine styles with simple accessories for variation. Keep edges smooth for a refined finish. Organize tools for easy access. Focus on symmetry and consistency.
Budget or Time Planning
Use accessible materials to reduce costs. Plan styling sessions in advance to save time. Choose styles that match available time and skill level. Allocate time for preparation and maintenance.
Creative Expansion and Advanced Inspiration
Experiment with combining braids, twists, and buns for new variations. Introduce patterns and textures for added detail. Explore different sizes and placements to create unique styles. Maintain structure while expanding creative possibilities.